Users and Credentials
Everyware Cloud accounts contain users. Users have one identity and one or more credentials. Users can be assigned one or more roles and can be granted one or more permissions.
When logged into Everyware Cloud console, navigate to the Users section to review and manage all the users created under the current account in scope.
Before creating a new user consider to create one or more roles. Roles are the recommended way to assign permissions to users.
Define Users for a New Account
When a new account is created, the list of its users is empty. The responsibility to create the first user of a new account is in charge to the administrators of the parent account:
- From the parent account check that the new account has a non zero user quota
- Go to the settings of the User Service of the new account
- Verify that max number of users is greater than zero otherwise set the number to the correct value.
- Move from the parent account to the new account using the account menu at the top right.
- Go to the Users view then create the new user.
Don't forget to assign Credentials and grant Roles and/or Permissions.
There's no mandatory requirements for the users that need to be defined in an account, however, it is strongly recommended to create at least one account administrator user. More users can be added during the lifecycle of the account.
It is a common practice that the default administrator user of an account is named as the account itself. For illustration purposes, the table below assumes "acme" as the account name. Replace "acme" with the name of the account just created.
| User | Description | Credentials Type | Granted Role/Permissions |
|---|---|---|---|
| acme | Administrator for the Acme account. | PASSWORD | Role: admin |
Create a new User
Account administrators can create new users for the Everyware Cloud Console. To create a new user, click the New button in the Users section to open the New User dialog as shown in the following screen capture.
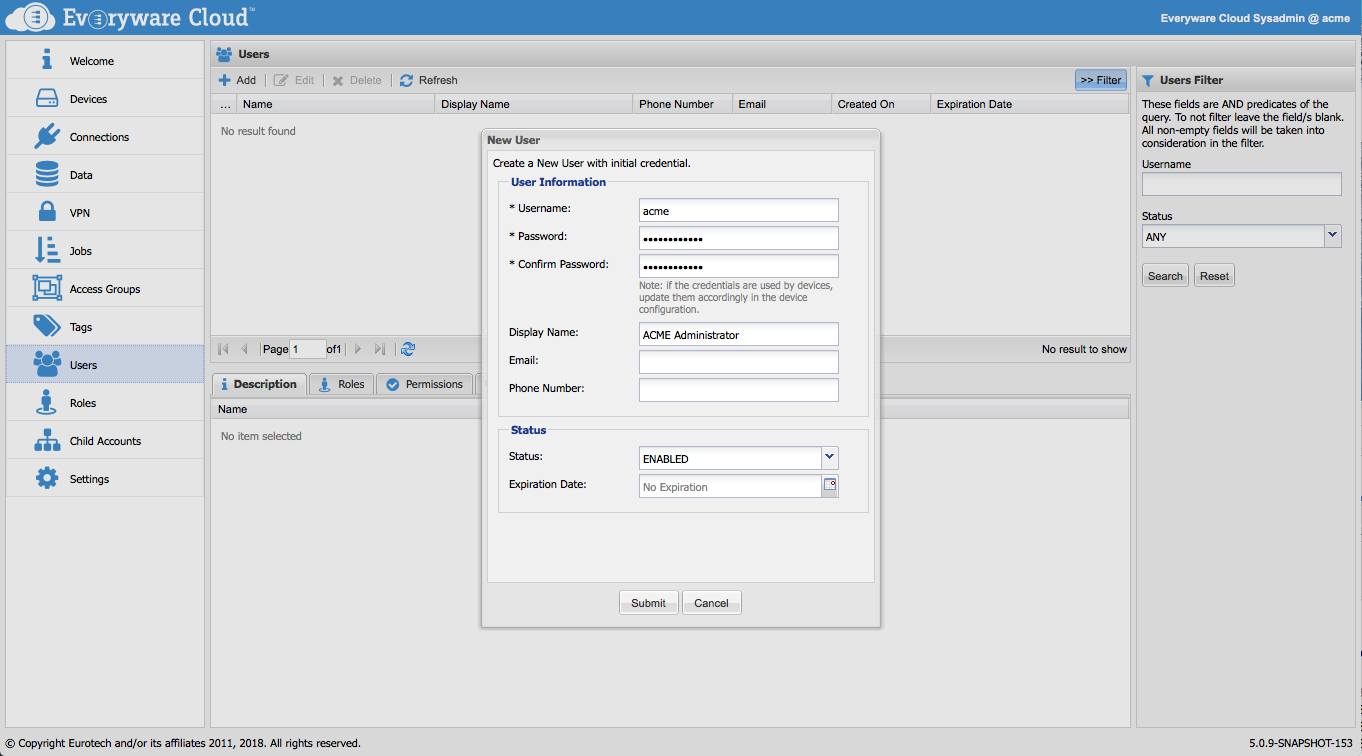
The following table defines the User Information for new users.
| Parameter | Description |
|---|---|
| Username | Must be at least 3 characters and can contain alphanumeric characters combined with dash and/or underscore. |
| Password | Must be 12 characters and contain at least one lower case letter, one upper case letter, one digit, and one special character. The password provided will be used to create the new user's credentials of PASSWORD type. |
| Display Name | A “user-recognizable” name assigned to the user, for display purposes only |
| User’s email | |
| Phone Number | User’s phone number |
Enter the User Information and use the tooltips provided in the Console for assistance.
Two additional parameters control the status of the user, which can be enabled or disabled, and provide an optional user's expiration date.
When completed, click Submit to create the new user.
User Credentials
A user can have one or more credentials. Credentials can be of two types: password and API key.
| Credentials Type | Credentials Description |
|---|---|
| PASSWORD | Password credentials can be used to authenticate to the Everyware Cloud platform through a username/password credentials pair. Such authentication mechanism can be used for the Everyware Cloud Console, and the messaging broker. When creating a new user, the password provided in the New User dialog is leveraged to create new Credentials of type PASSWORD. |
| API_KEY | API Key credentials can be used to authenticate to the Everyware Cloud platform REST API. |
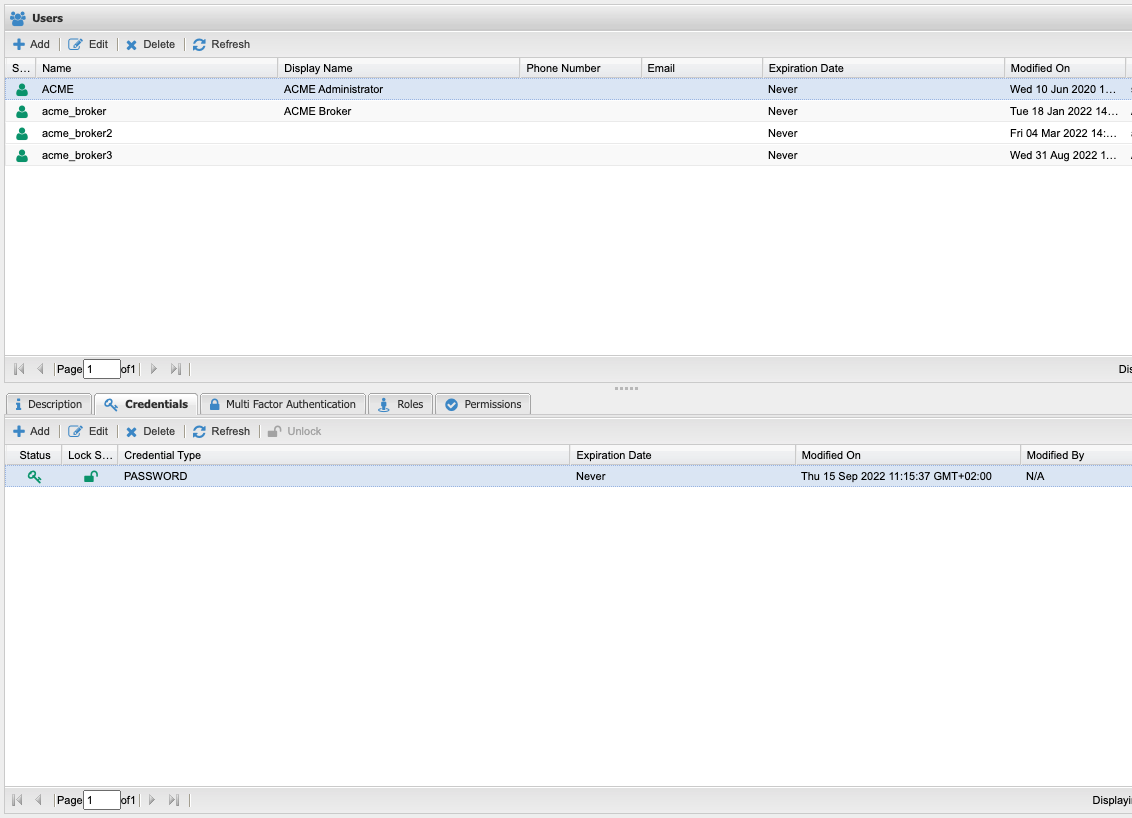
In the Users section, select a user and access the Credentials tab to review and manage the credentials associated with the user.
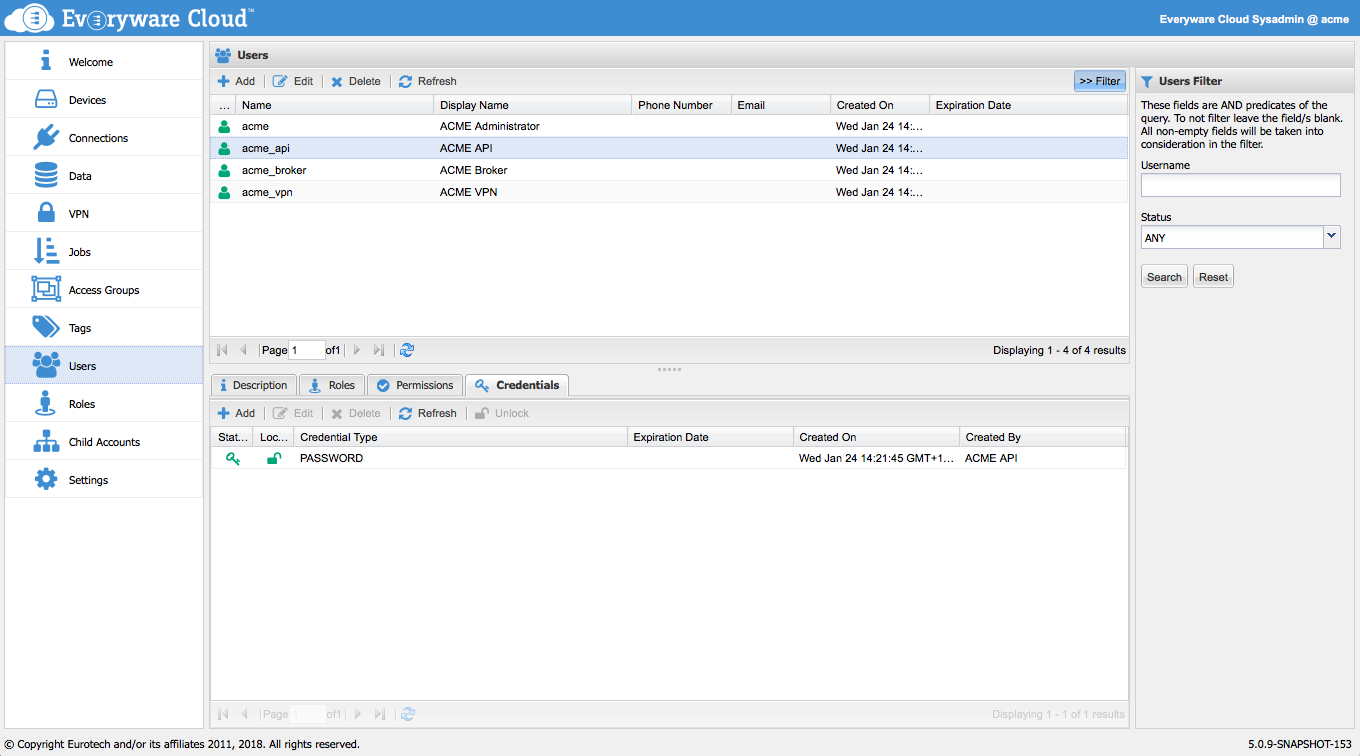
Click the Add button to add new credentials to the currently selected user. Select the Credentials type and use the two additional parameters to control the status of the credentials, which can be enabled or disabled, and provide an optional credentials's expiration date.
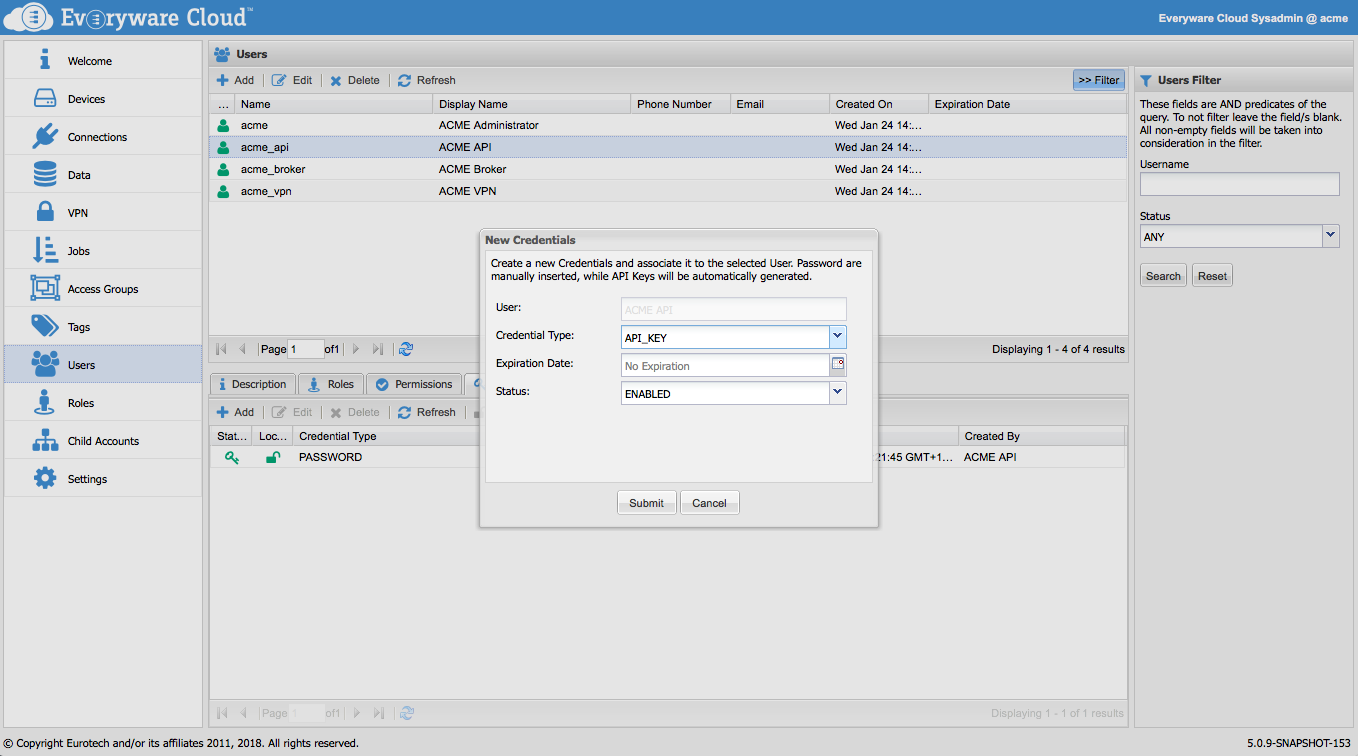
When creating credentials of type PASSWORD, provide the password and confirm it.
When creating credentials of type API_KEY, provide the password and confirm it. After the API_KEY are created, a confirmation dialog will show the resulting API Key. Write it down and keep it somewhere safe, since this will not be provided in clear any more..
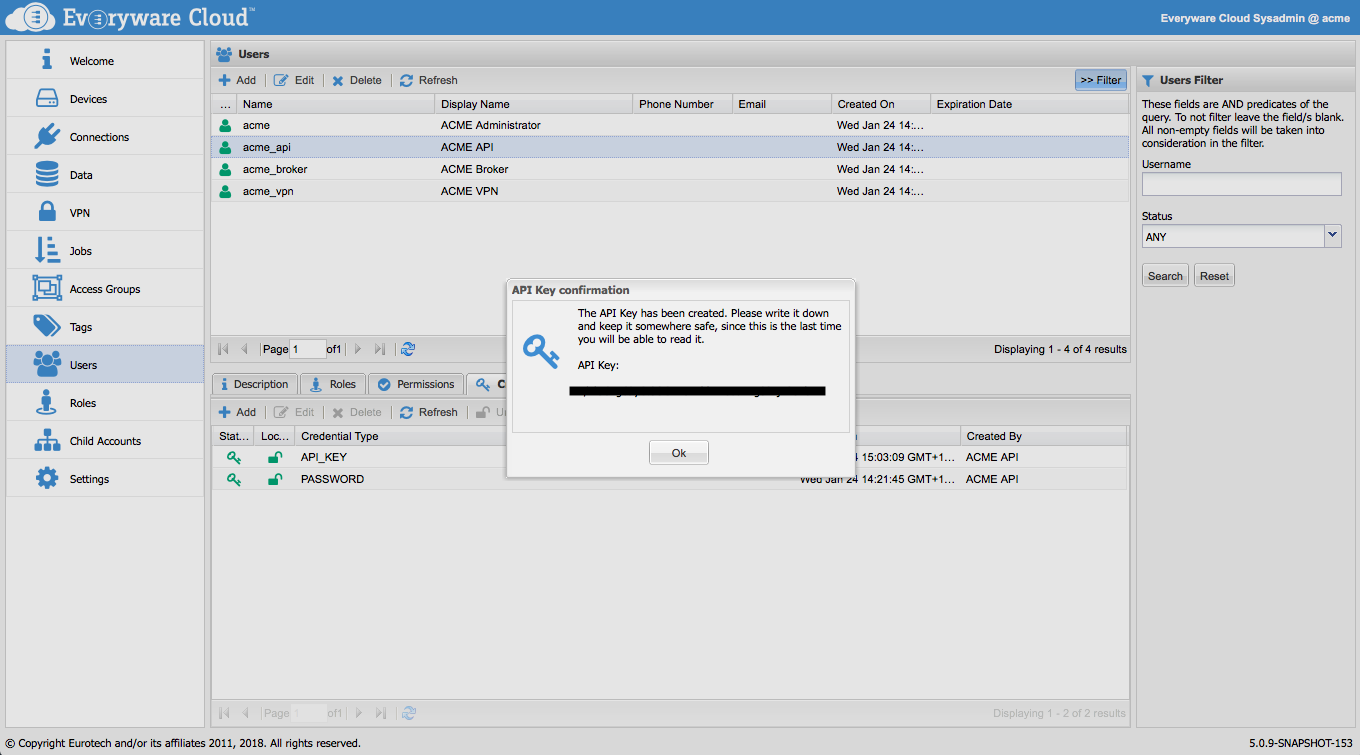
To edit user's credentials, select the credentials in the table and click on the Edit.
To delete user's credentials, select the credentials in the table and click on the Delete.
Minimum Password Length
Users password must, by default, be at least 12 characters long, and must contain at least one uppercase letter, one lowercase letter, one number and one symbol. However, the 12 characters minimum limit can be increased both at Account level and at System level.
To change the limit for a single account, go to the Account Settings and open the CredentialService configuration:
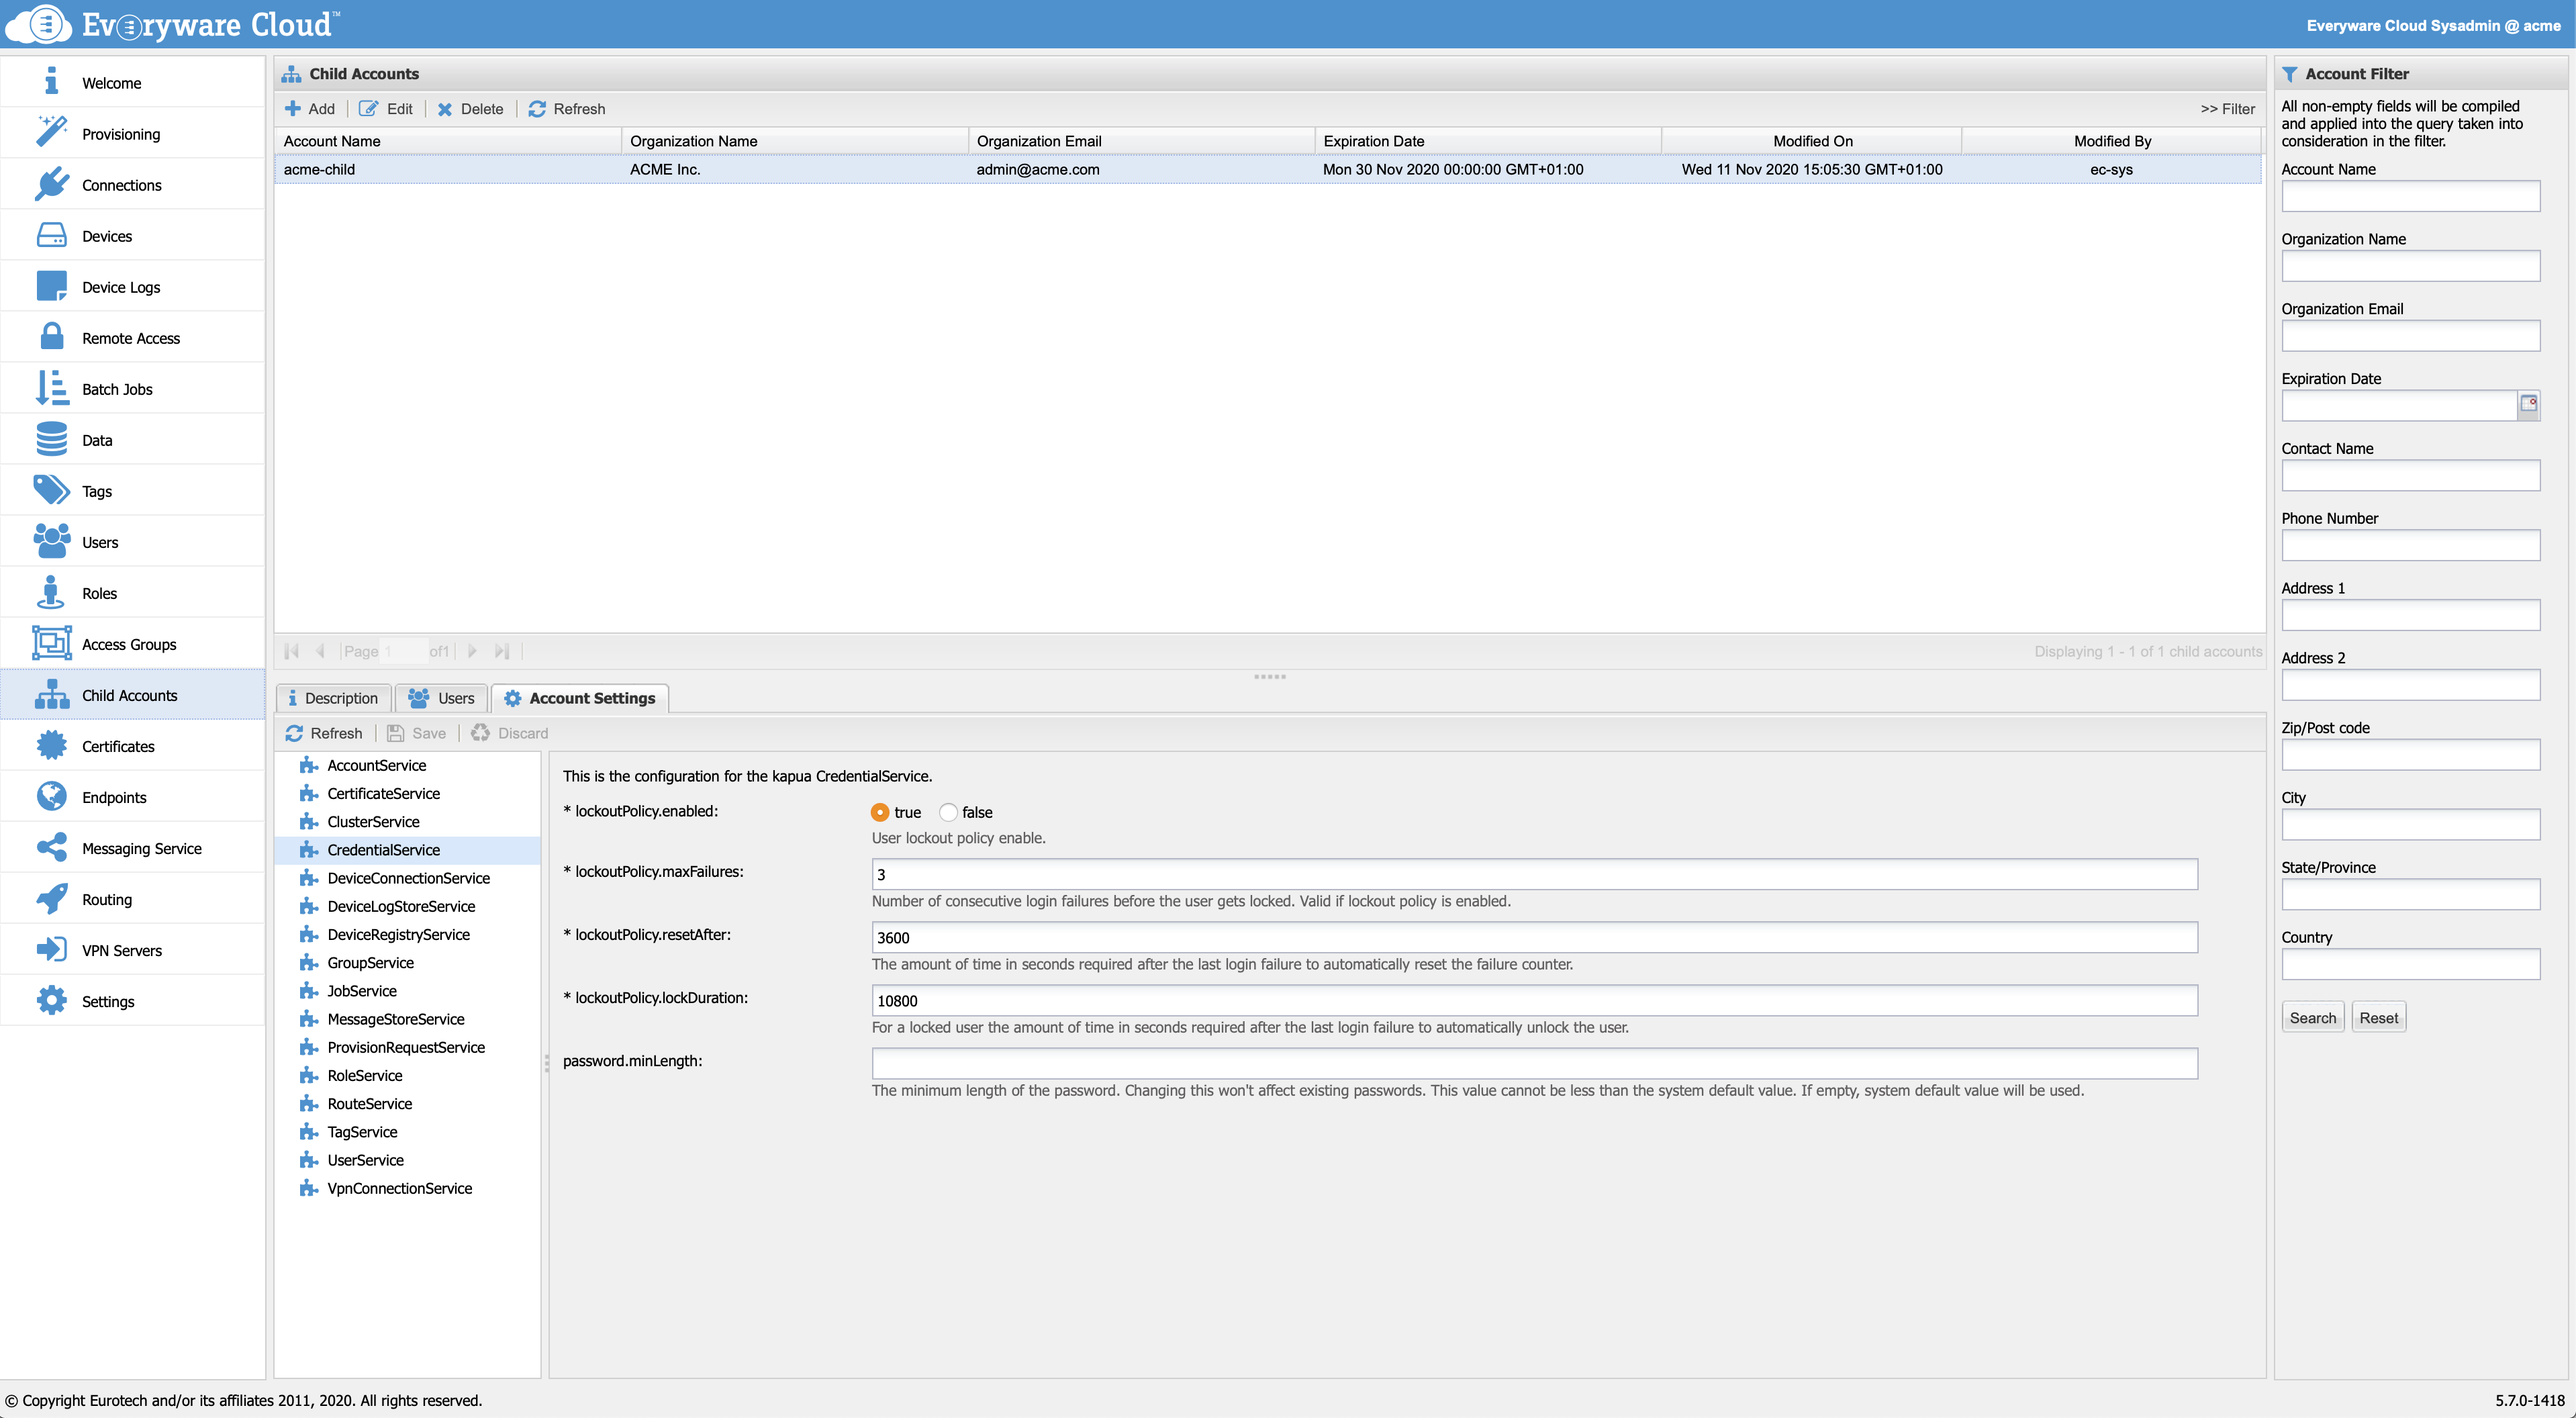
CredentialService configuration
Using the password.minLength configuration, a new minimum limit can be enforced when creating a new password; the allowed values are numbers between 12 and 255 (inclusive). If empty, the default system value will be used. Such default value can be specified at deploy time with the AUTH_PASSWORD_MIN_LENGTH variable. Again, allowed values are numbers between 12 and 255 (inclusive). If a value lower than 12 is used, 12 will be assumed; similarly, if a value higher than 255 is used, 255 will be assumed.
The minimum password length will only be enforced on new passwords; existing passwords will not be affected in any way after modifying the setting.
Configure Lockout Policy
A Lockout Policy can be activated in order to set the number of failed sign-in attempts that will cause a user account to be locked. This mechanism is intended to make a brute force password attack harder to carry out. In fact, it can be assumed that a valid user might type his or her password incorrectly once or twice but not many times in a row.
The policy is activated at the account settings level, its behavior is controlled by several parameters that the account manager can tune based on the needs of the solution:
| Parameter | Default Value | Description |
|---|---|---|
| lockoutPolicy.enabled | true | User lockout policy enable. Possible values are true or false |
| lockoutPolicy.maxFailures | 3 | Number of consecutive login failures before the user gets locked. After a successful login the count of failures is reset. |
| lockoutPolicy.resetAfter | 3600 | The amount of time in seconds required after the last login failure to automatically reset the failure counter. |
| lockoutPolicy.lockDuration | 10800 | The amount of time in seconds required after the last login failure to automatically unlock a locked user user. |
Users with proper permissions can forcibly unlock a locked credential of another user.
Unlock a locked password
To unlock a locked user credential, either wait that the lock duration time expires or ask the account administrator to force unlock the credential. To force the unlock:
- Open the User view
- Select the locked user
- Select the Credentials tab
- Select the locked credential (colored in red)
- Click on the Unlock button
The credential turns to green, the lockout policy is reset and the user can use the credential again to get access to the platform.
Multi Factor Authentication
Everyware Cloud provides a Multi Factor Authentication feature (a.k.a. MFA), which allows a user to authenticate to a system only when he presents the password and another valid factor. A user can enable the MFA through the User menu in the Console. The user can also access the MFA configuration dialog through the upper right menu. Note that only the user itself can enable the MFA.
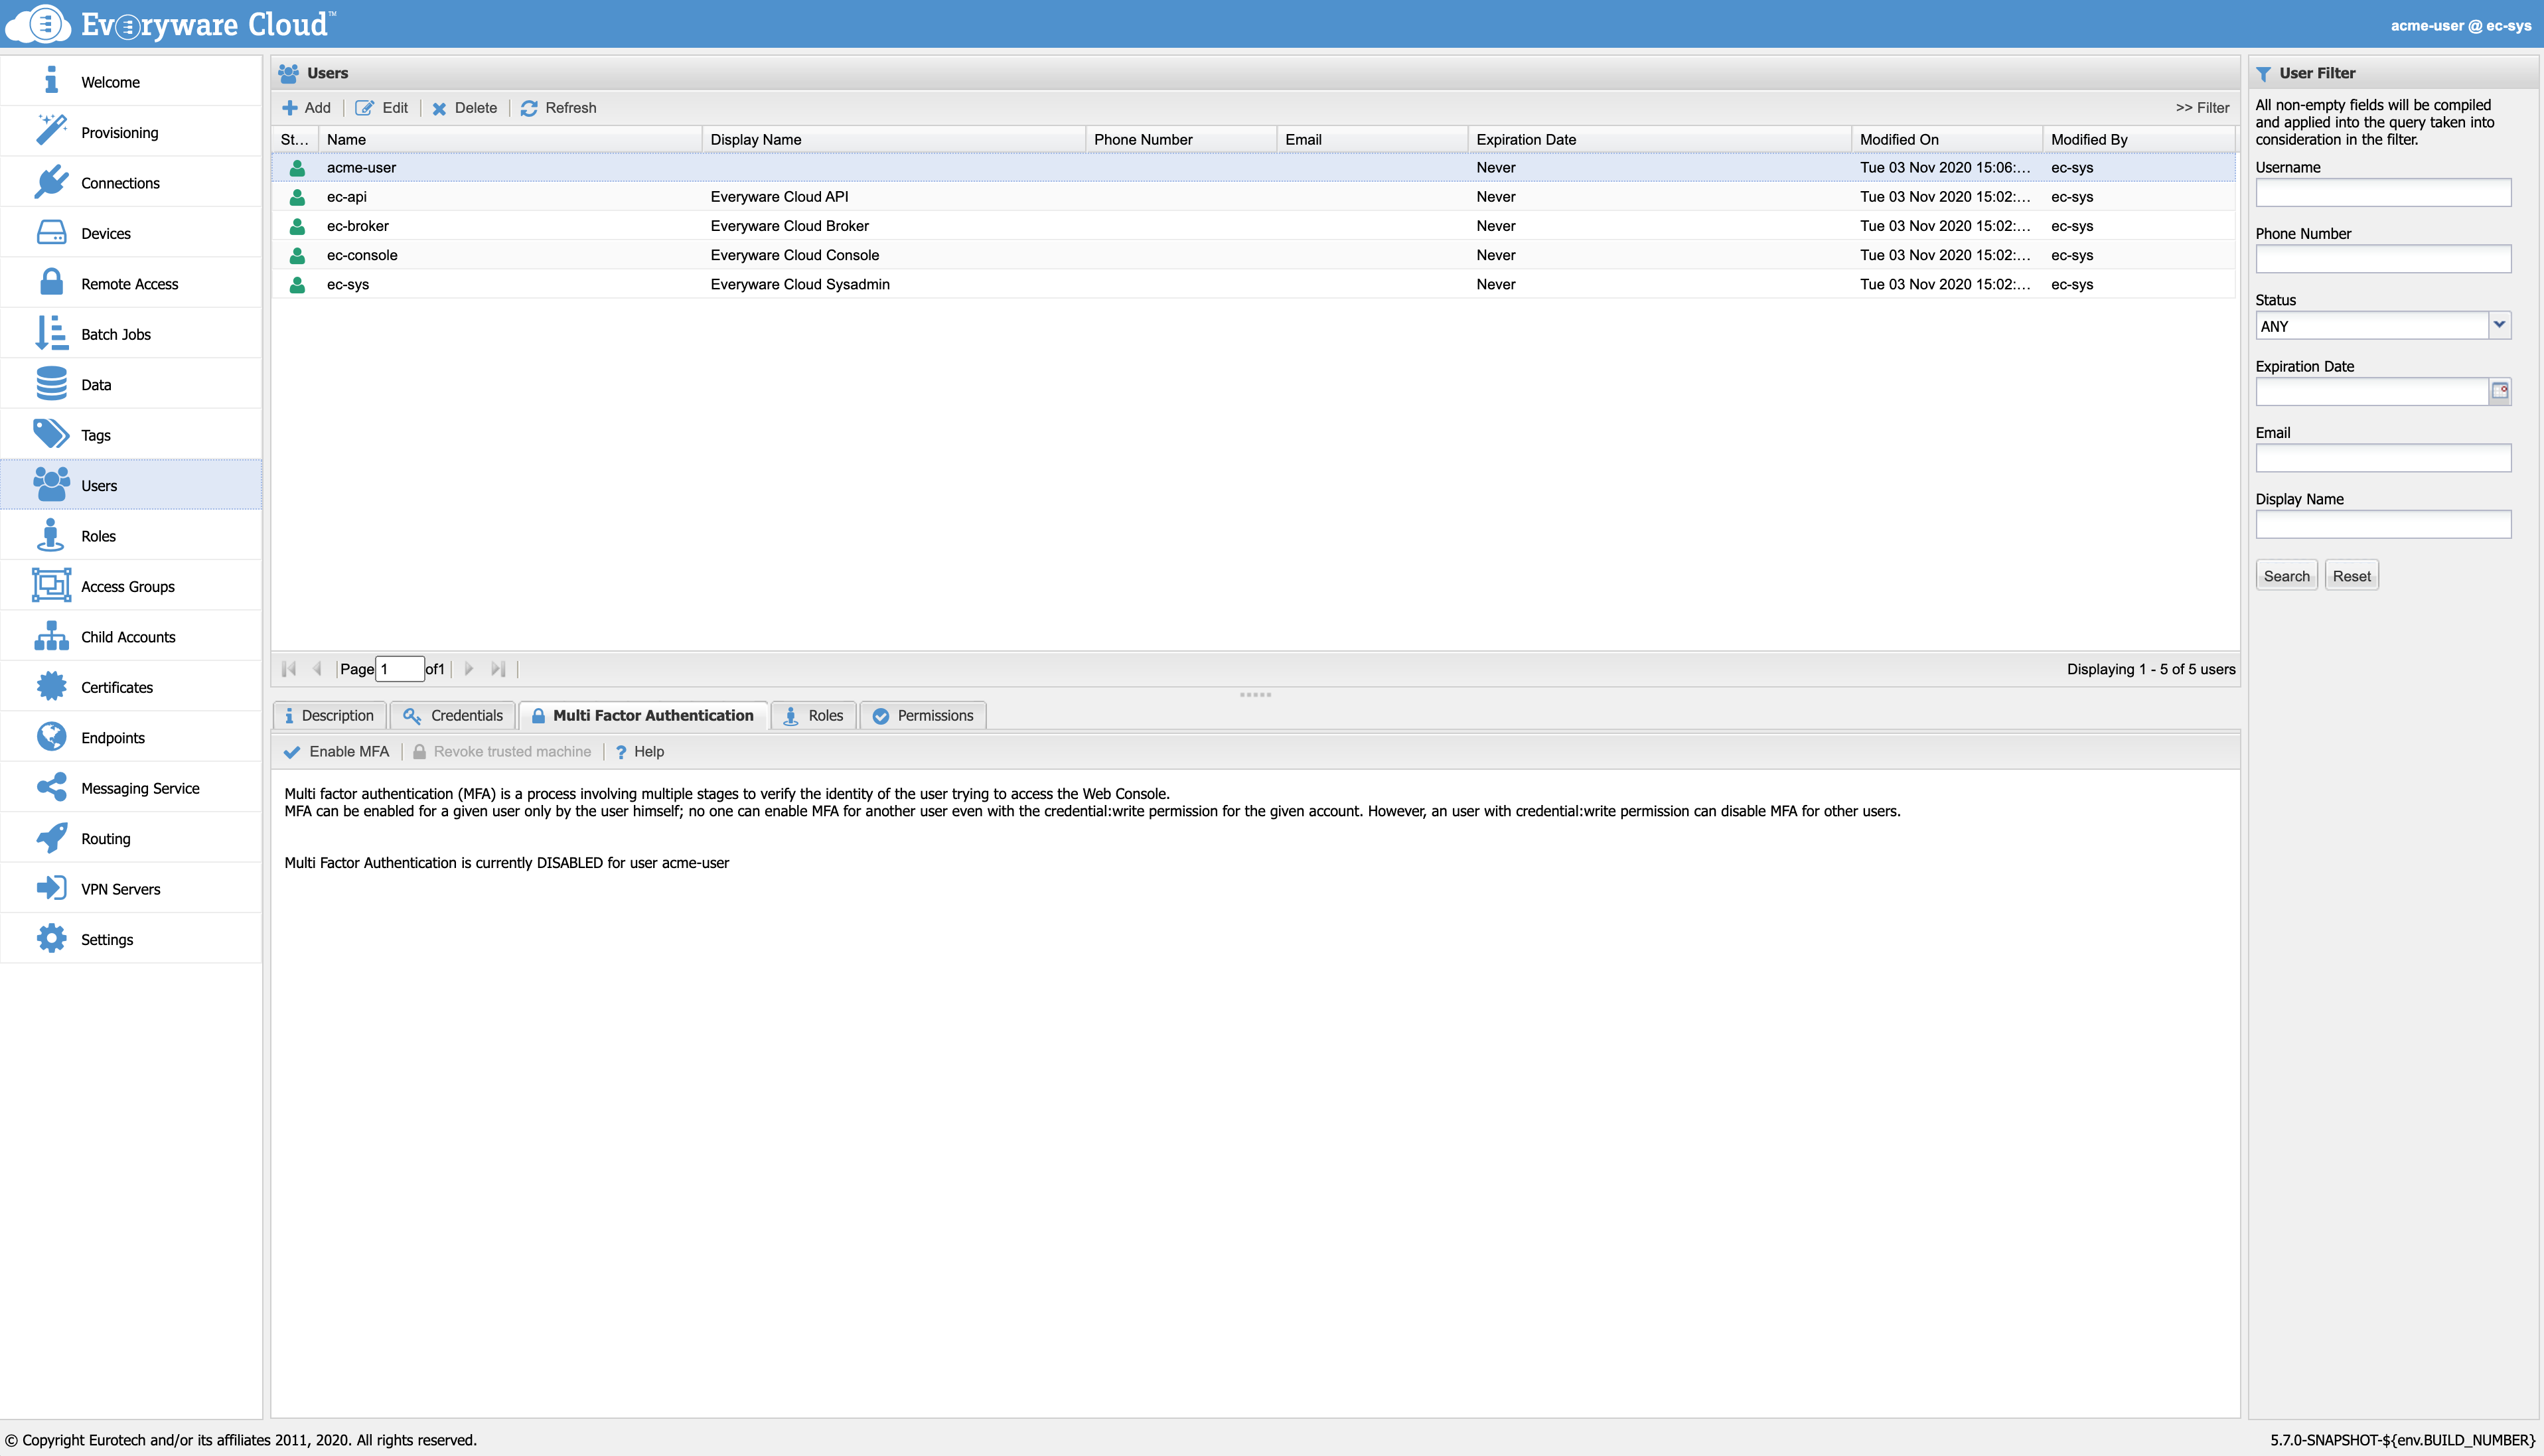
MFA tab in the Users section
MFA uses a secret to produce a one-time code to authenticate. The secret will be displayed in the form of a QR code during the MFA activation. This QR code can only be viewed once during MFA activation, and only by the user itself. To collect the QR code, use an authenticator app (e.g. the Google Authenticator App) installed on a smartphone. This app will be used to produce one-time authentication code.
Scratch codes are also produced, in order to pass the multi factor authentication in case the authenticator app is temporarily unavailable. Similarly to the QR code, also scratch codes can only be viewed once during MFA activation, and they can be viewed only by the user itself. Users have a limited number of scratch codes (the maximum number of scratch codes can be set through a dedicated environment variable, see the Web Console container properties section for more information). Furthermore, each scratch code is invalidated after being used once.
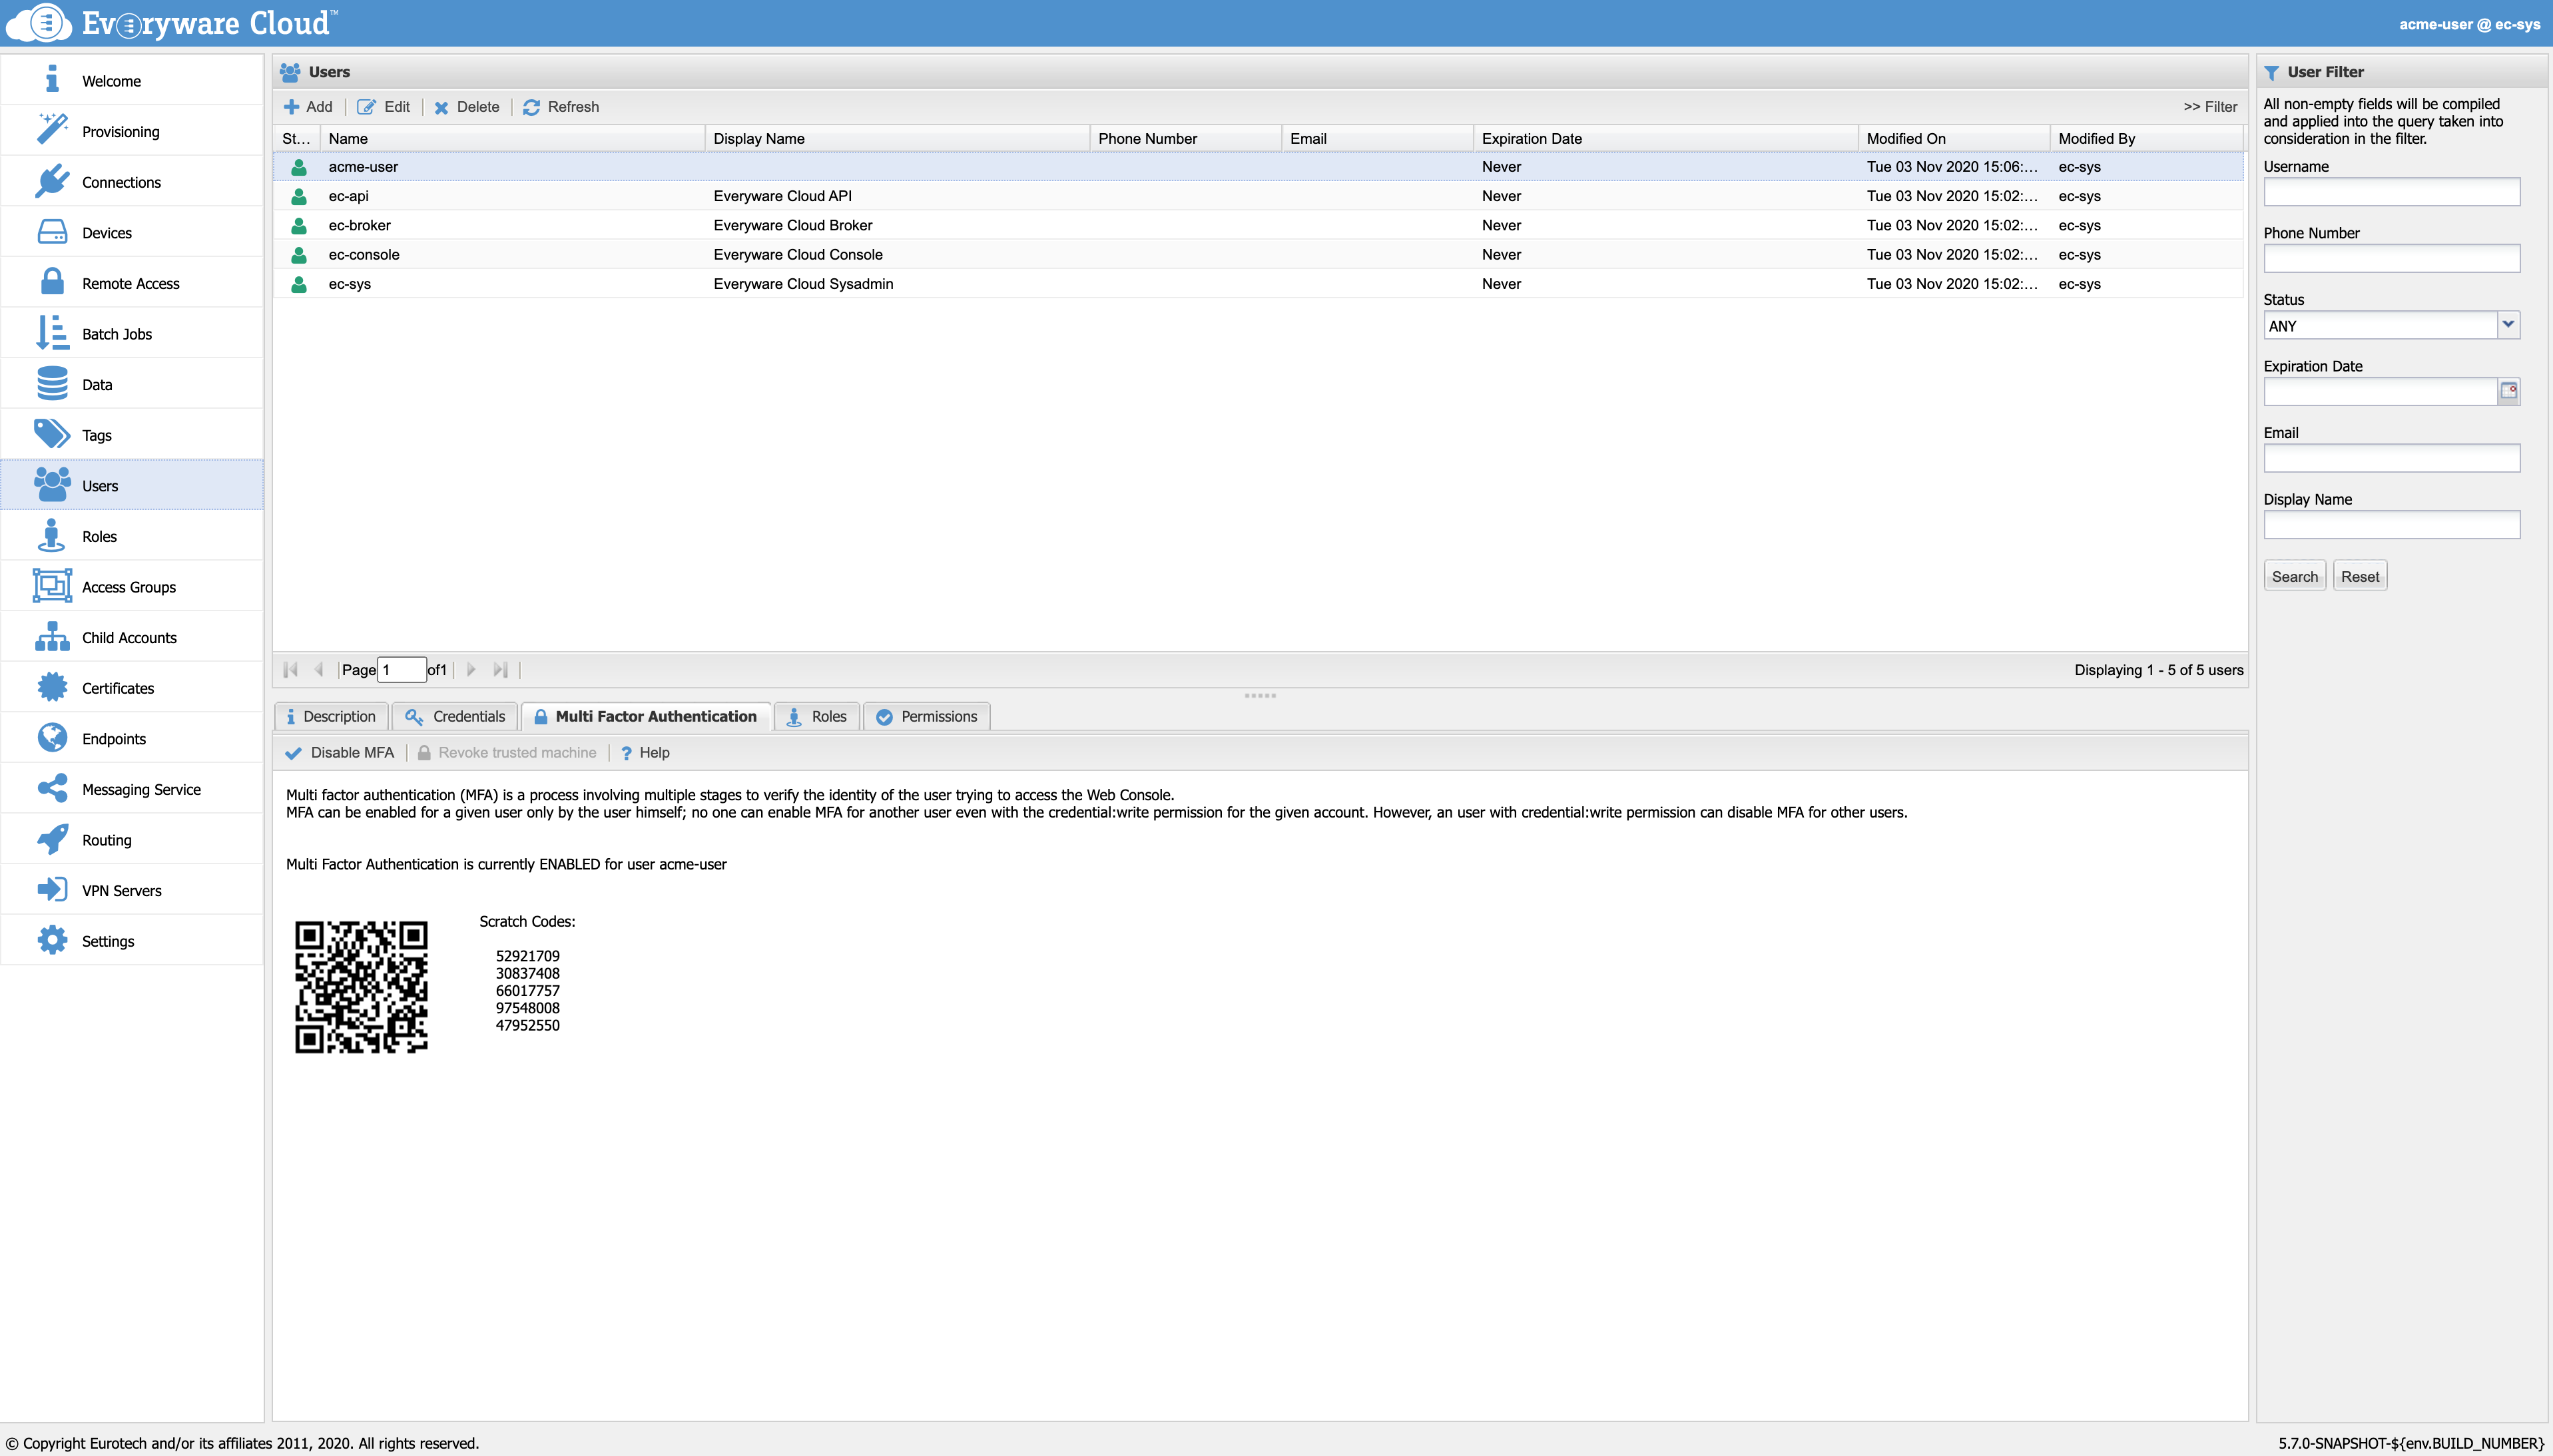
QR code and scratch codes.
The admin is able to see if the user have the MFA enabled or not. Moreover, even if only the user is allowed to enable MFA, the admin is allowed to disable it for each one of the users in the account.
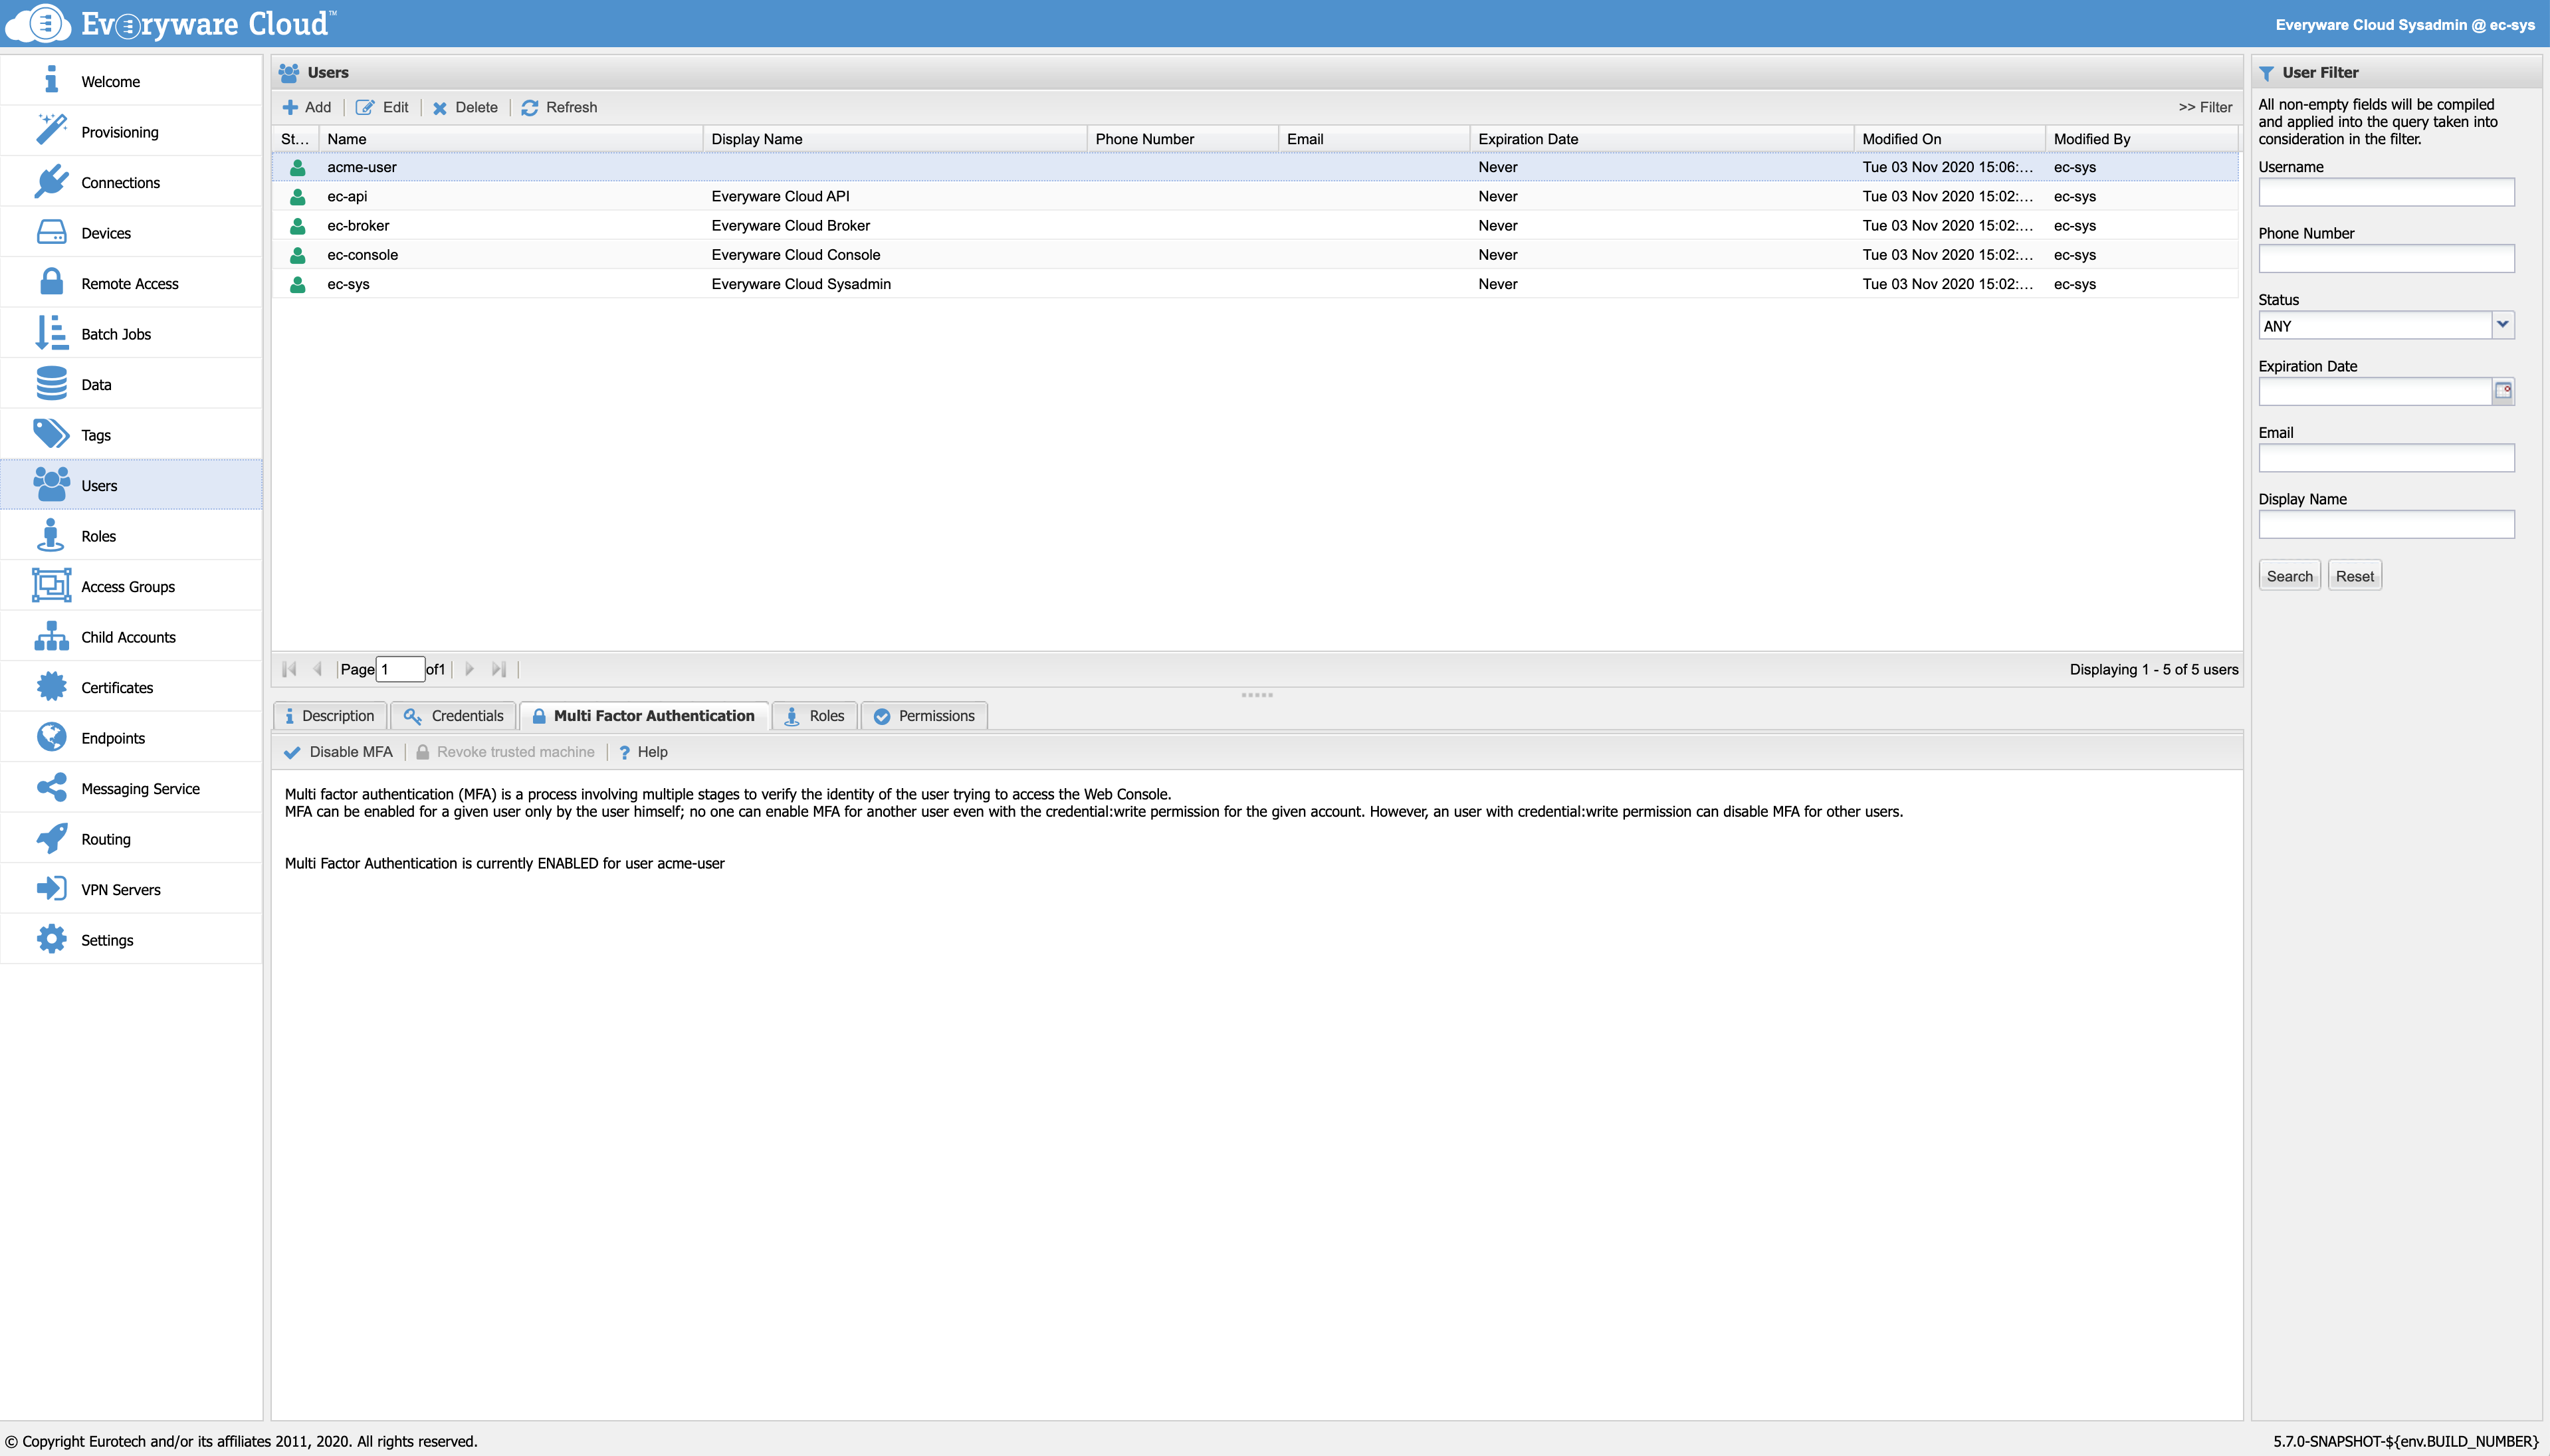
User view, from an admin point of view, with "Disable MFA" button.
When the MFA is enabled for a given user, such user has to type the one-time authentication code provided by the authenticator app as part of the login process to the Web Console.
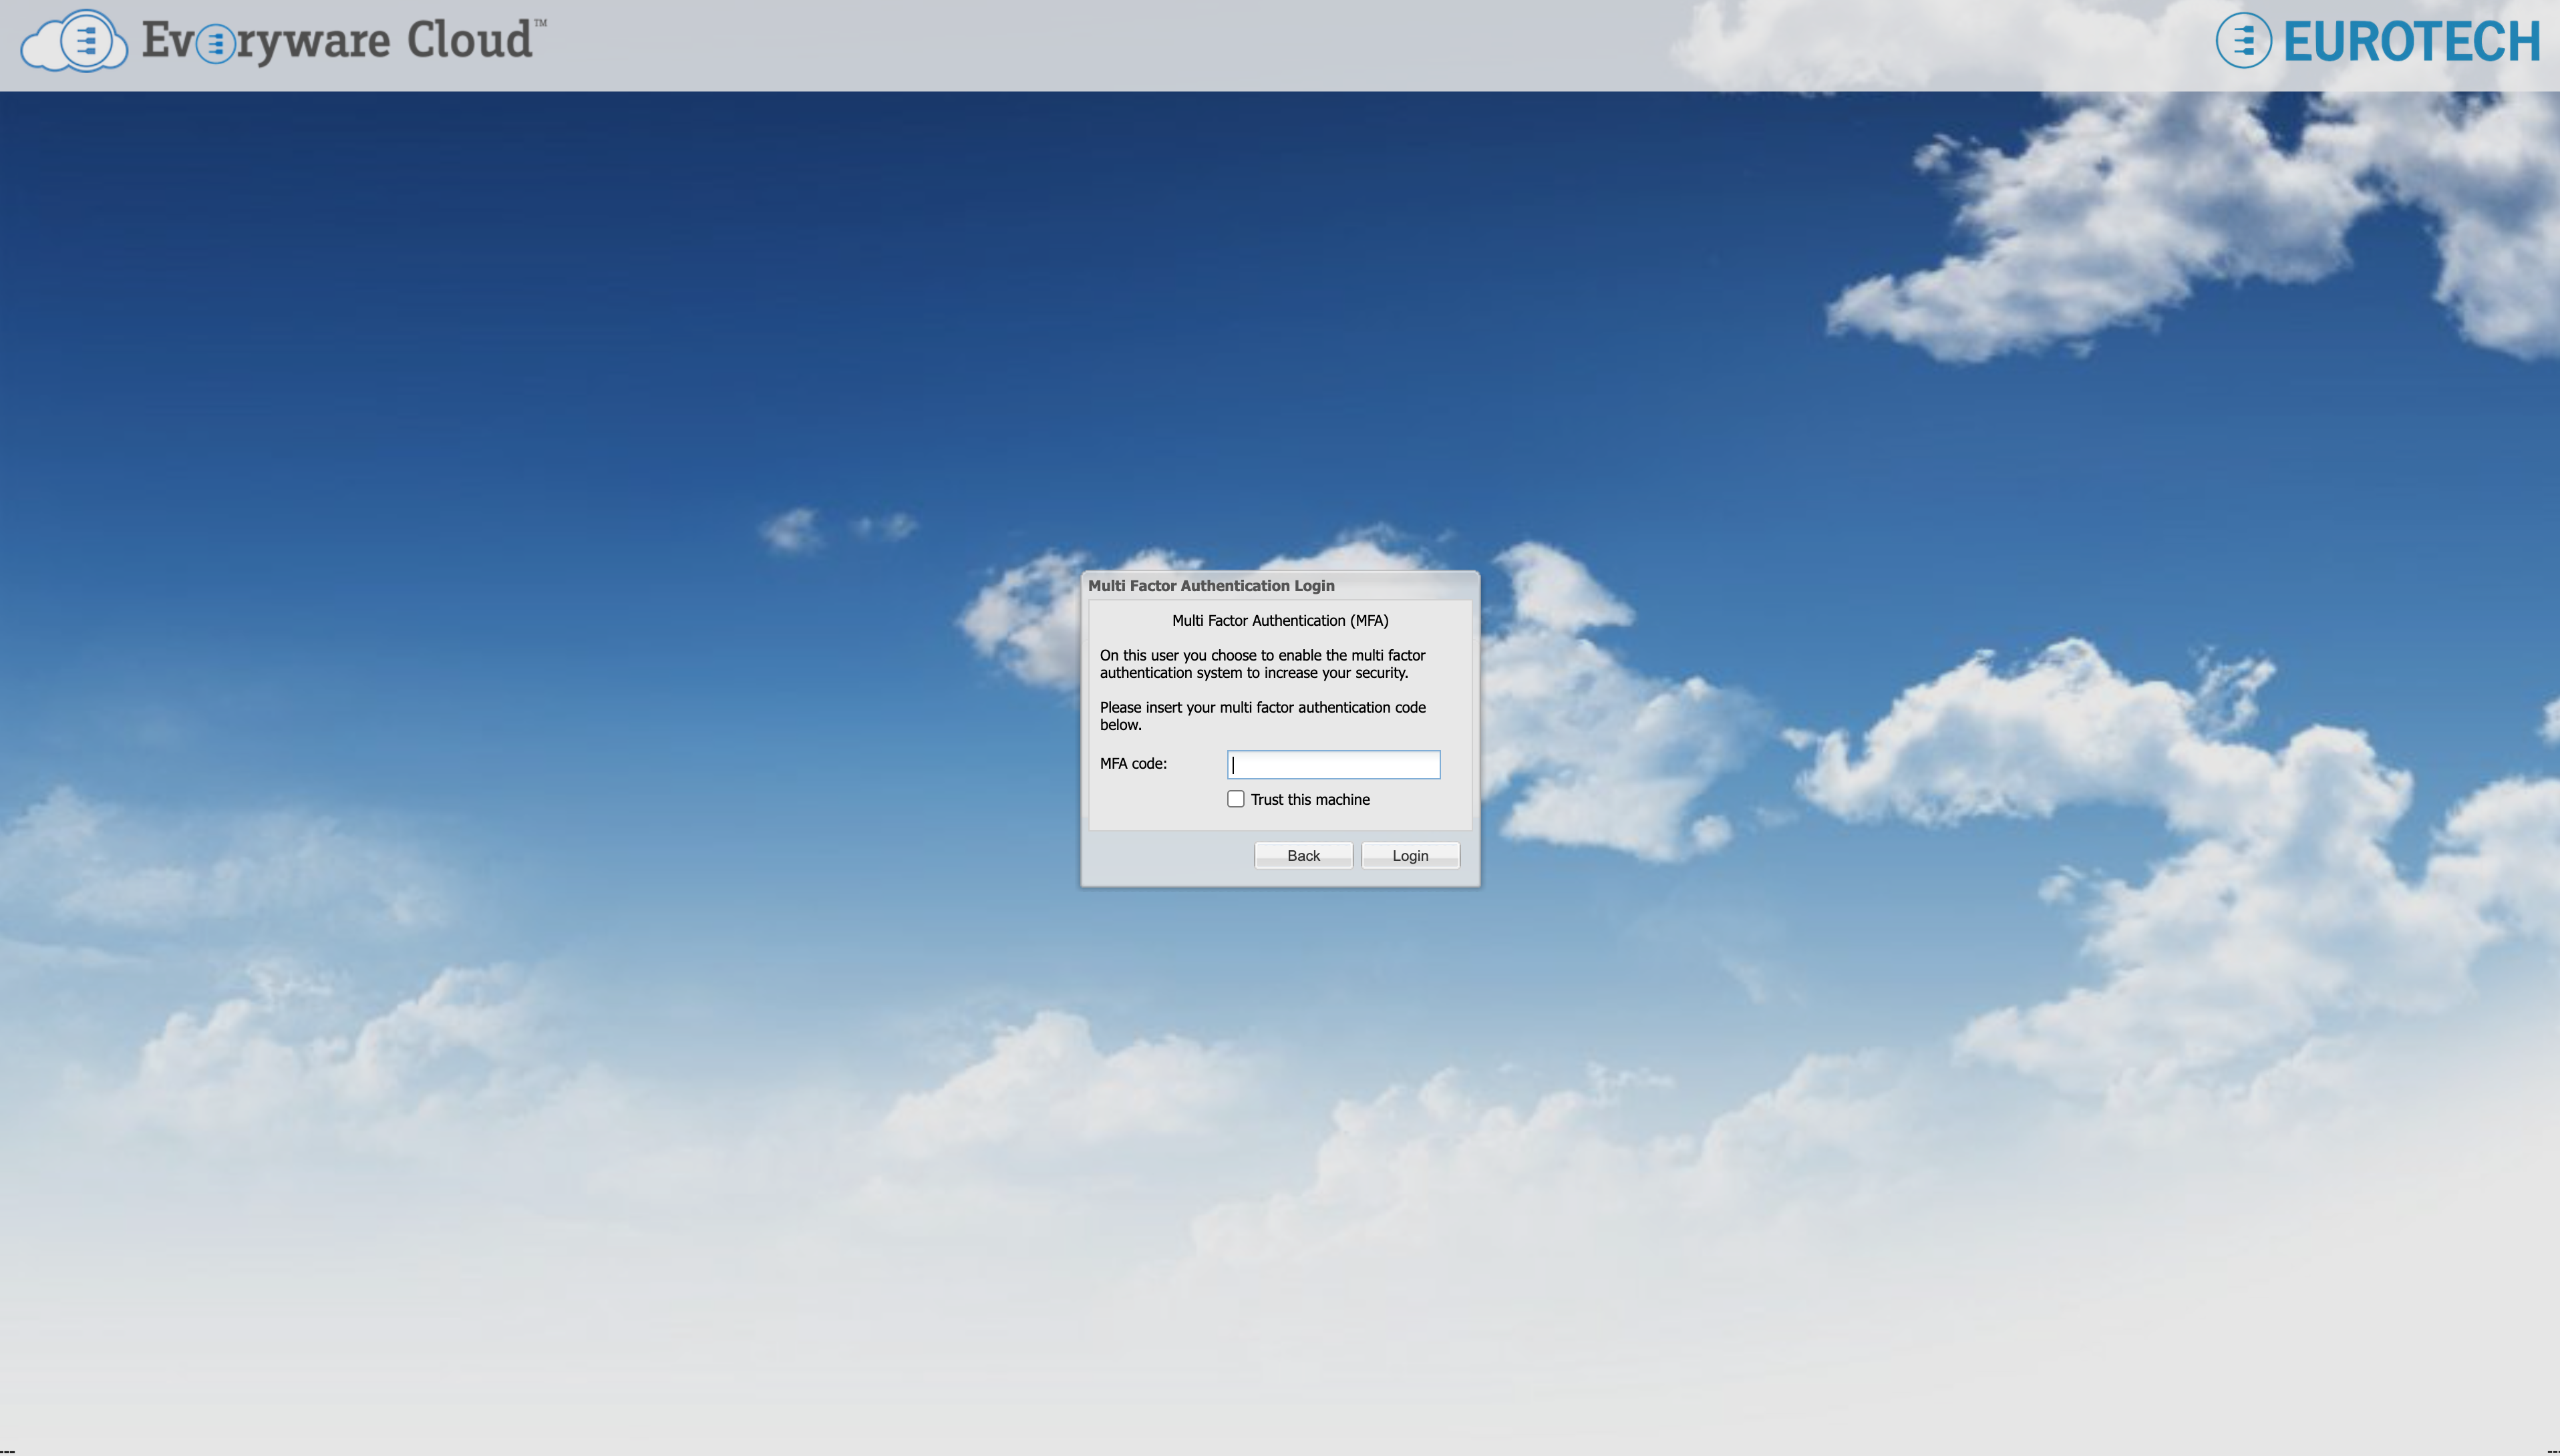
MFA authentication code view during the login process.
The user with enabled MFA can also trust the access to the console from one or more devices. In this way, the MFA procedure is enforced only on un-trusted devices. Note that the trust on the device expires after 30 days, and the admin is able to revoke the trusted device.
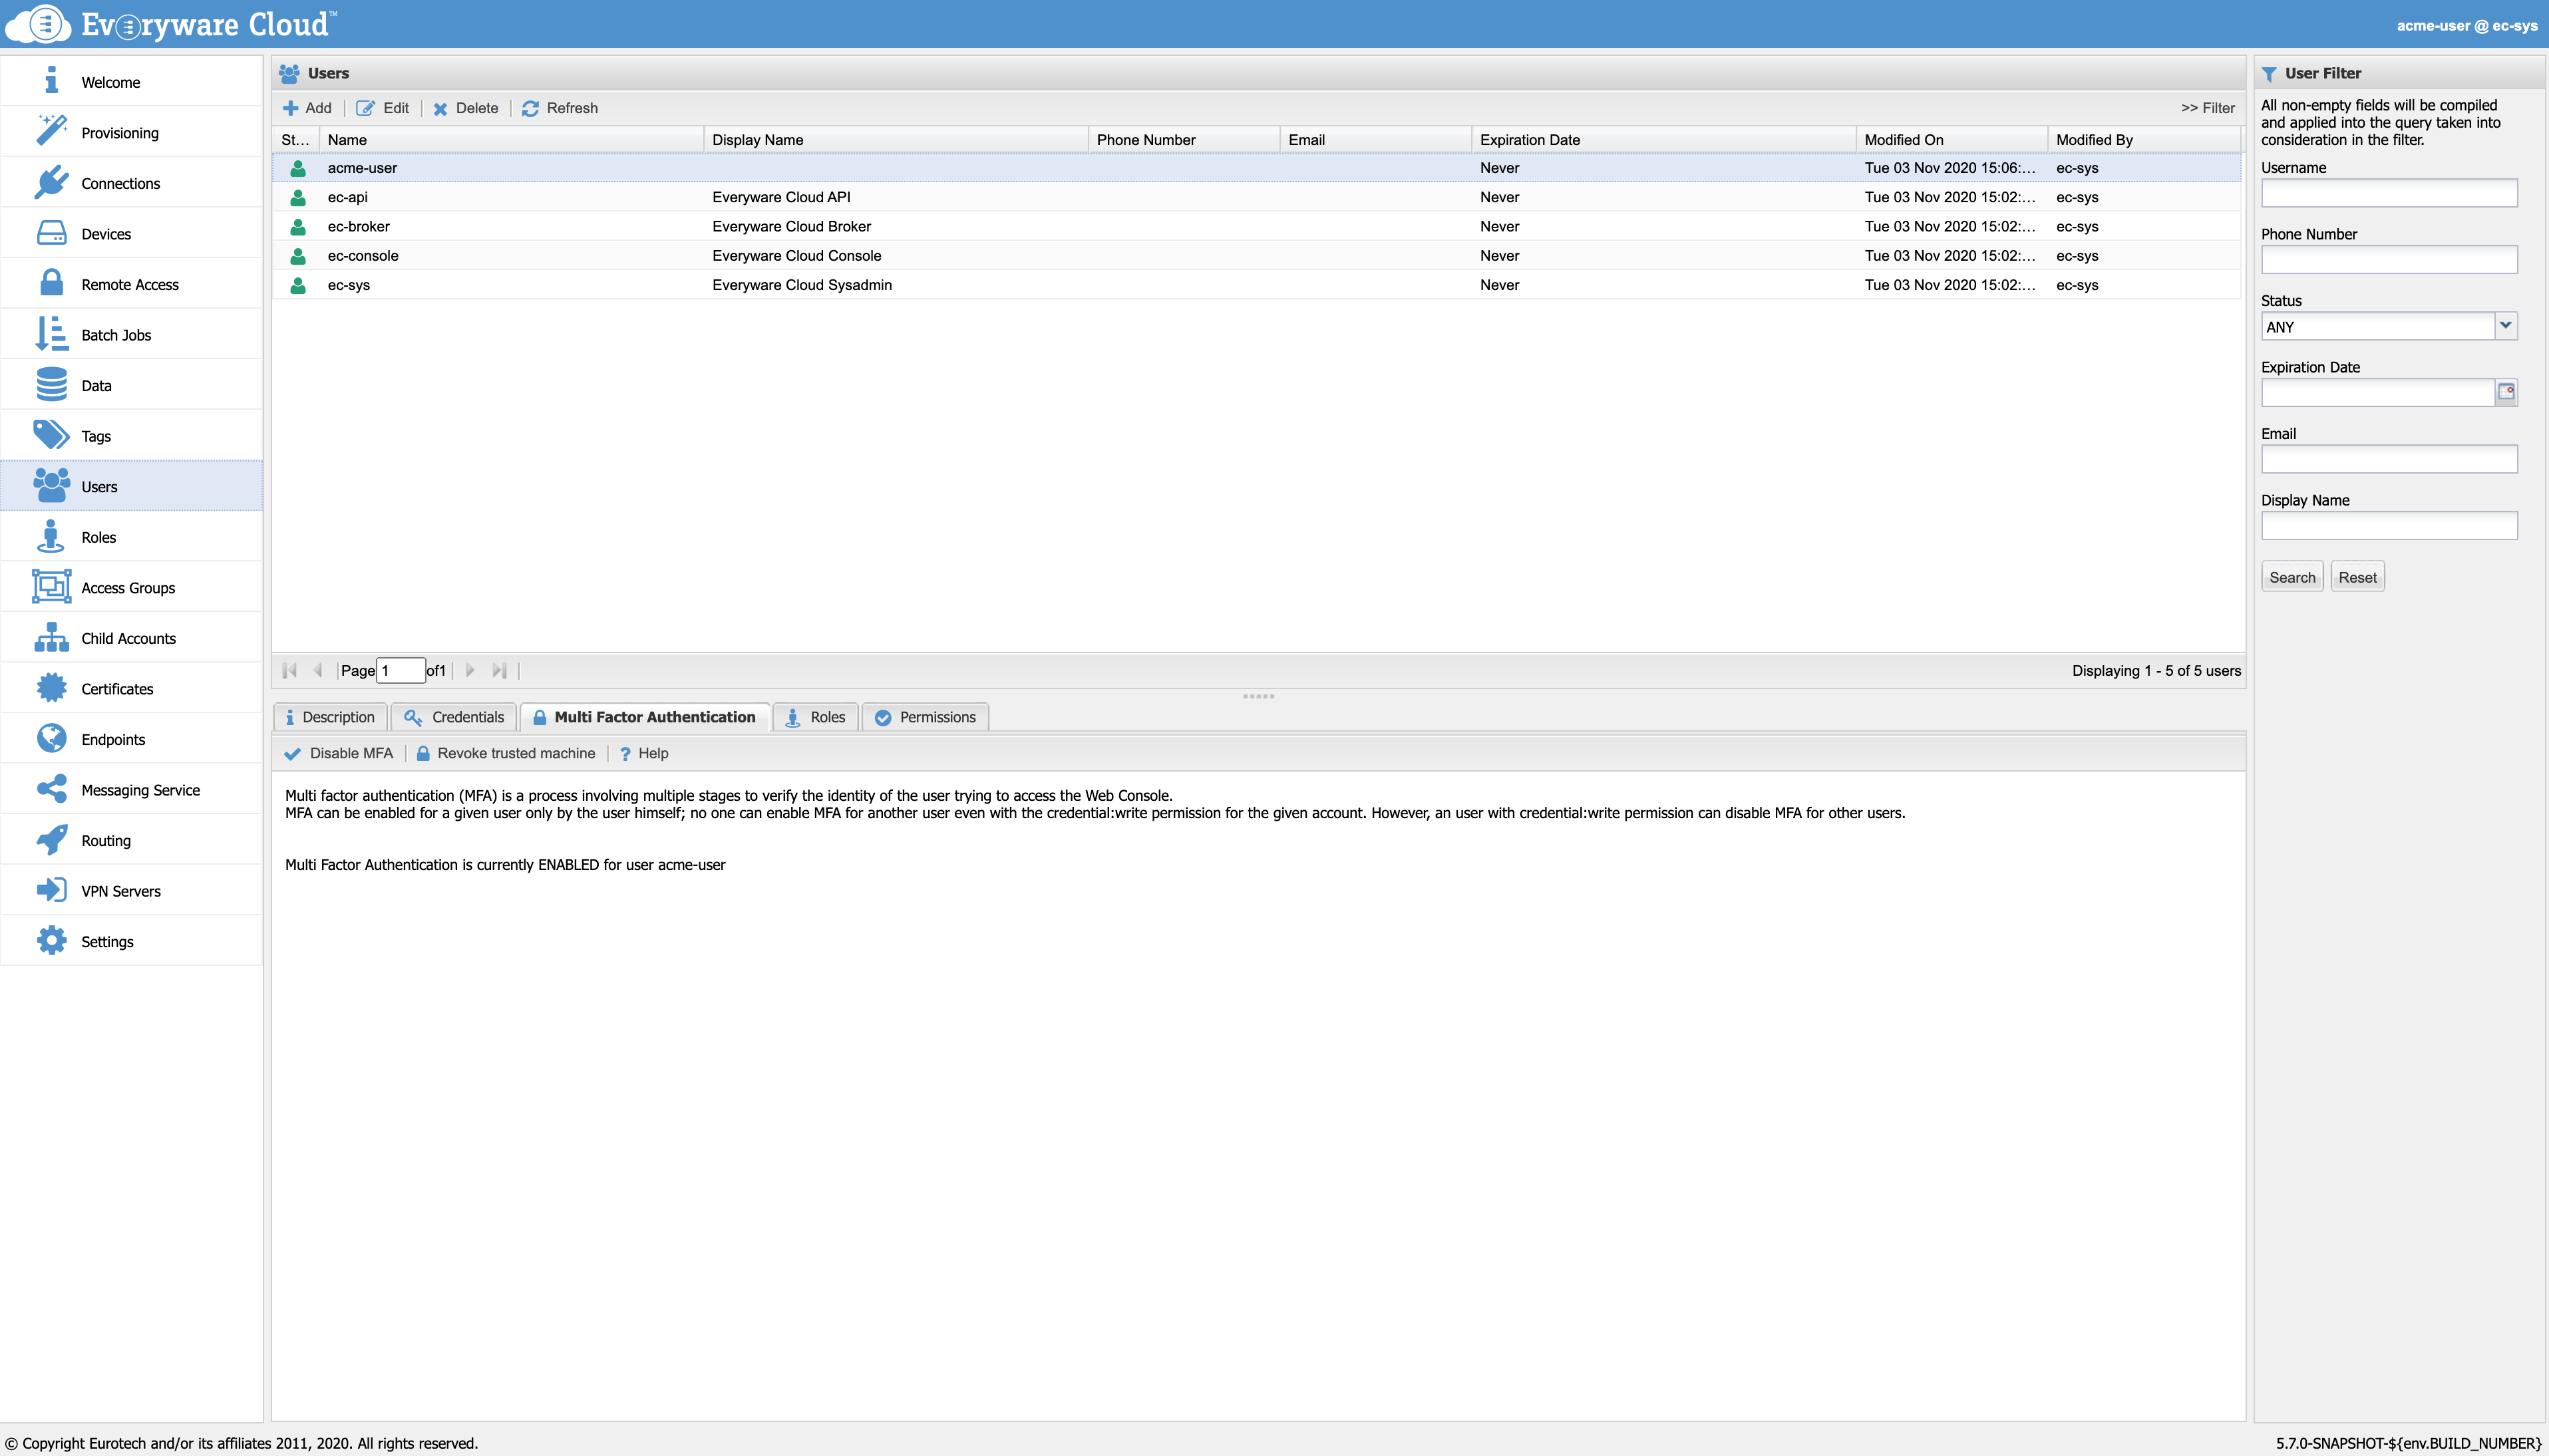
"Revoke trusted machine" button.
Delegated Authentication
Everyware Cloud supports delegated authentication of users through an external identity provider. When user requests to login, Everyware Cloud passes the control to the external provider which will request the user to enter its credentials and then validates them. If the validation is successful the control is passed back to Everyware Cloud which will complete the login and establish a valid session. This functionality simplifies the centralized management of users.
We speak about internally authenticated users when the authentication process is owned by Everyware Cloud; when the authentication process is delegated to an external identity provider we speak about externally authenticated users.
Enabled services
Check the section Enabled Services in this guide to verify which EC services support delegated authentication.
When delegated authentication is enabled, the Everyware Cloud login page shows an additional SSO (Single Sign On) button beside the Login button
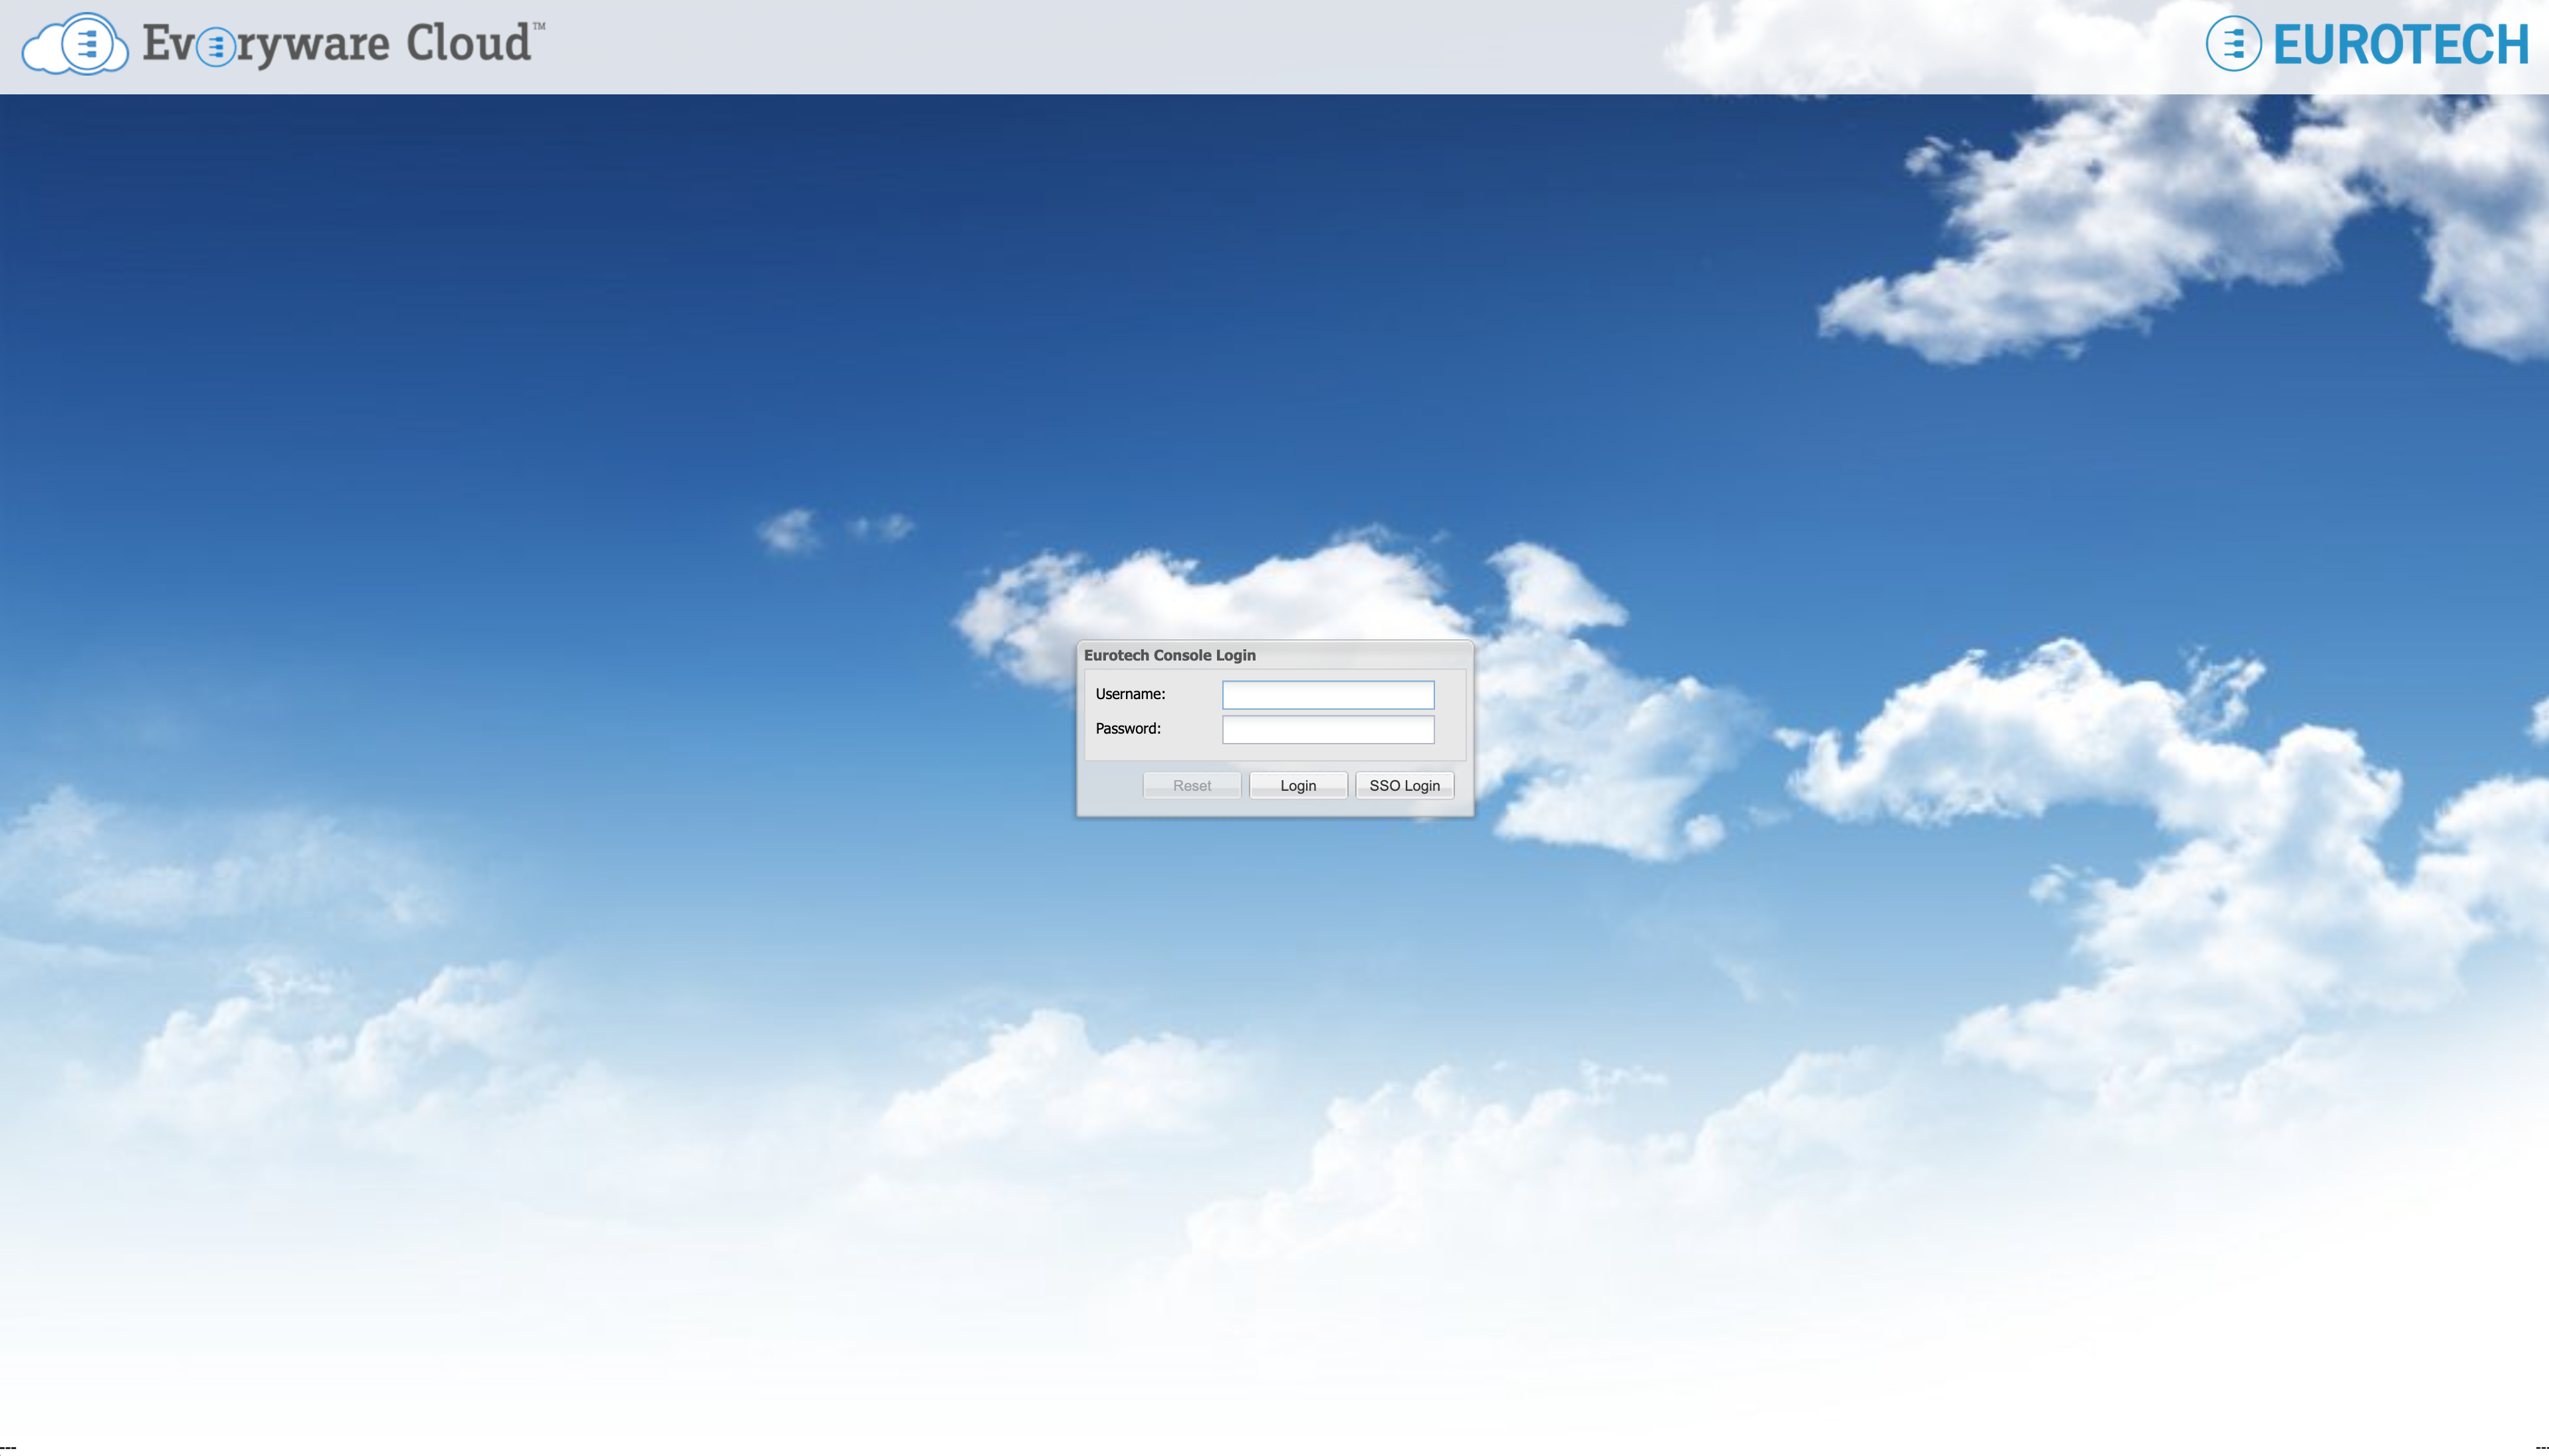
"SSO Login" button on the login dialog.
Use the usual Login button to login with internally authenticated users while use the SSO button with externally authenticated users.
To inform Everyware Cloud that the authentication of a user has to be delegated to an external identity provider, the user must be defined as an "External user" type. External users have permission and roles attached to them so that they can have an authorization profile, however, Everyware Cloud doesn't hold credentials for external users since credentials are managed by the external identity provider.
To create a new external user in Everyware Cloud, click the Add button in the Users section to open the New User dialog as shown in the following screen capture.
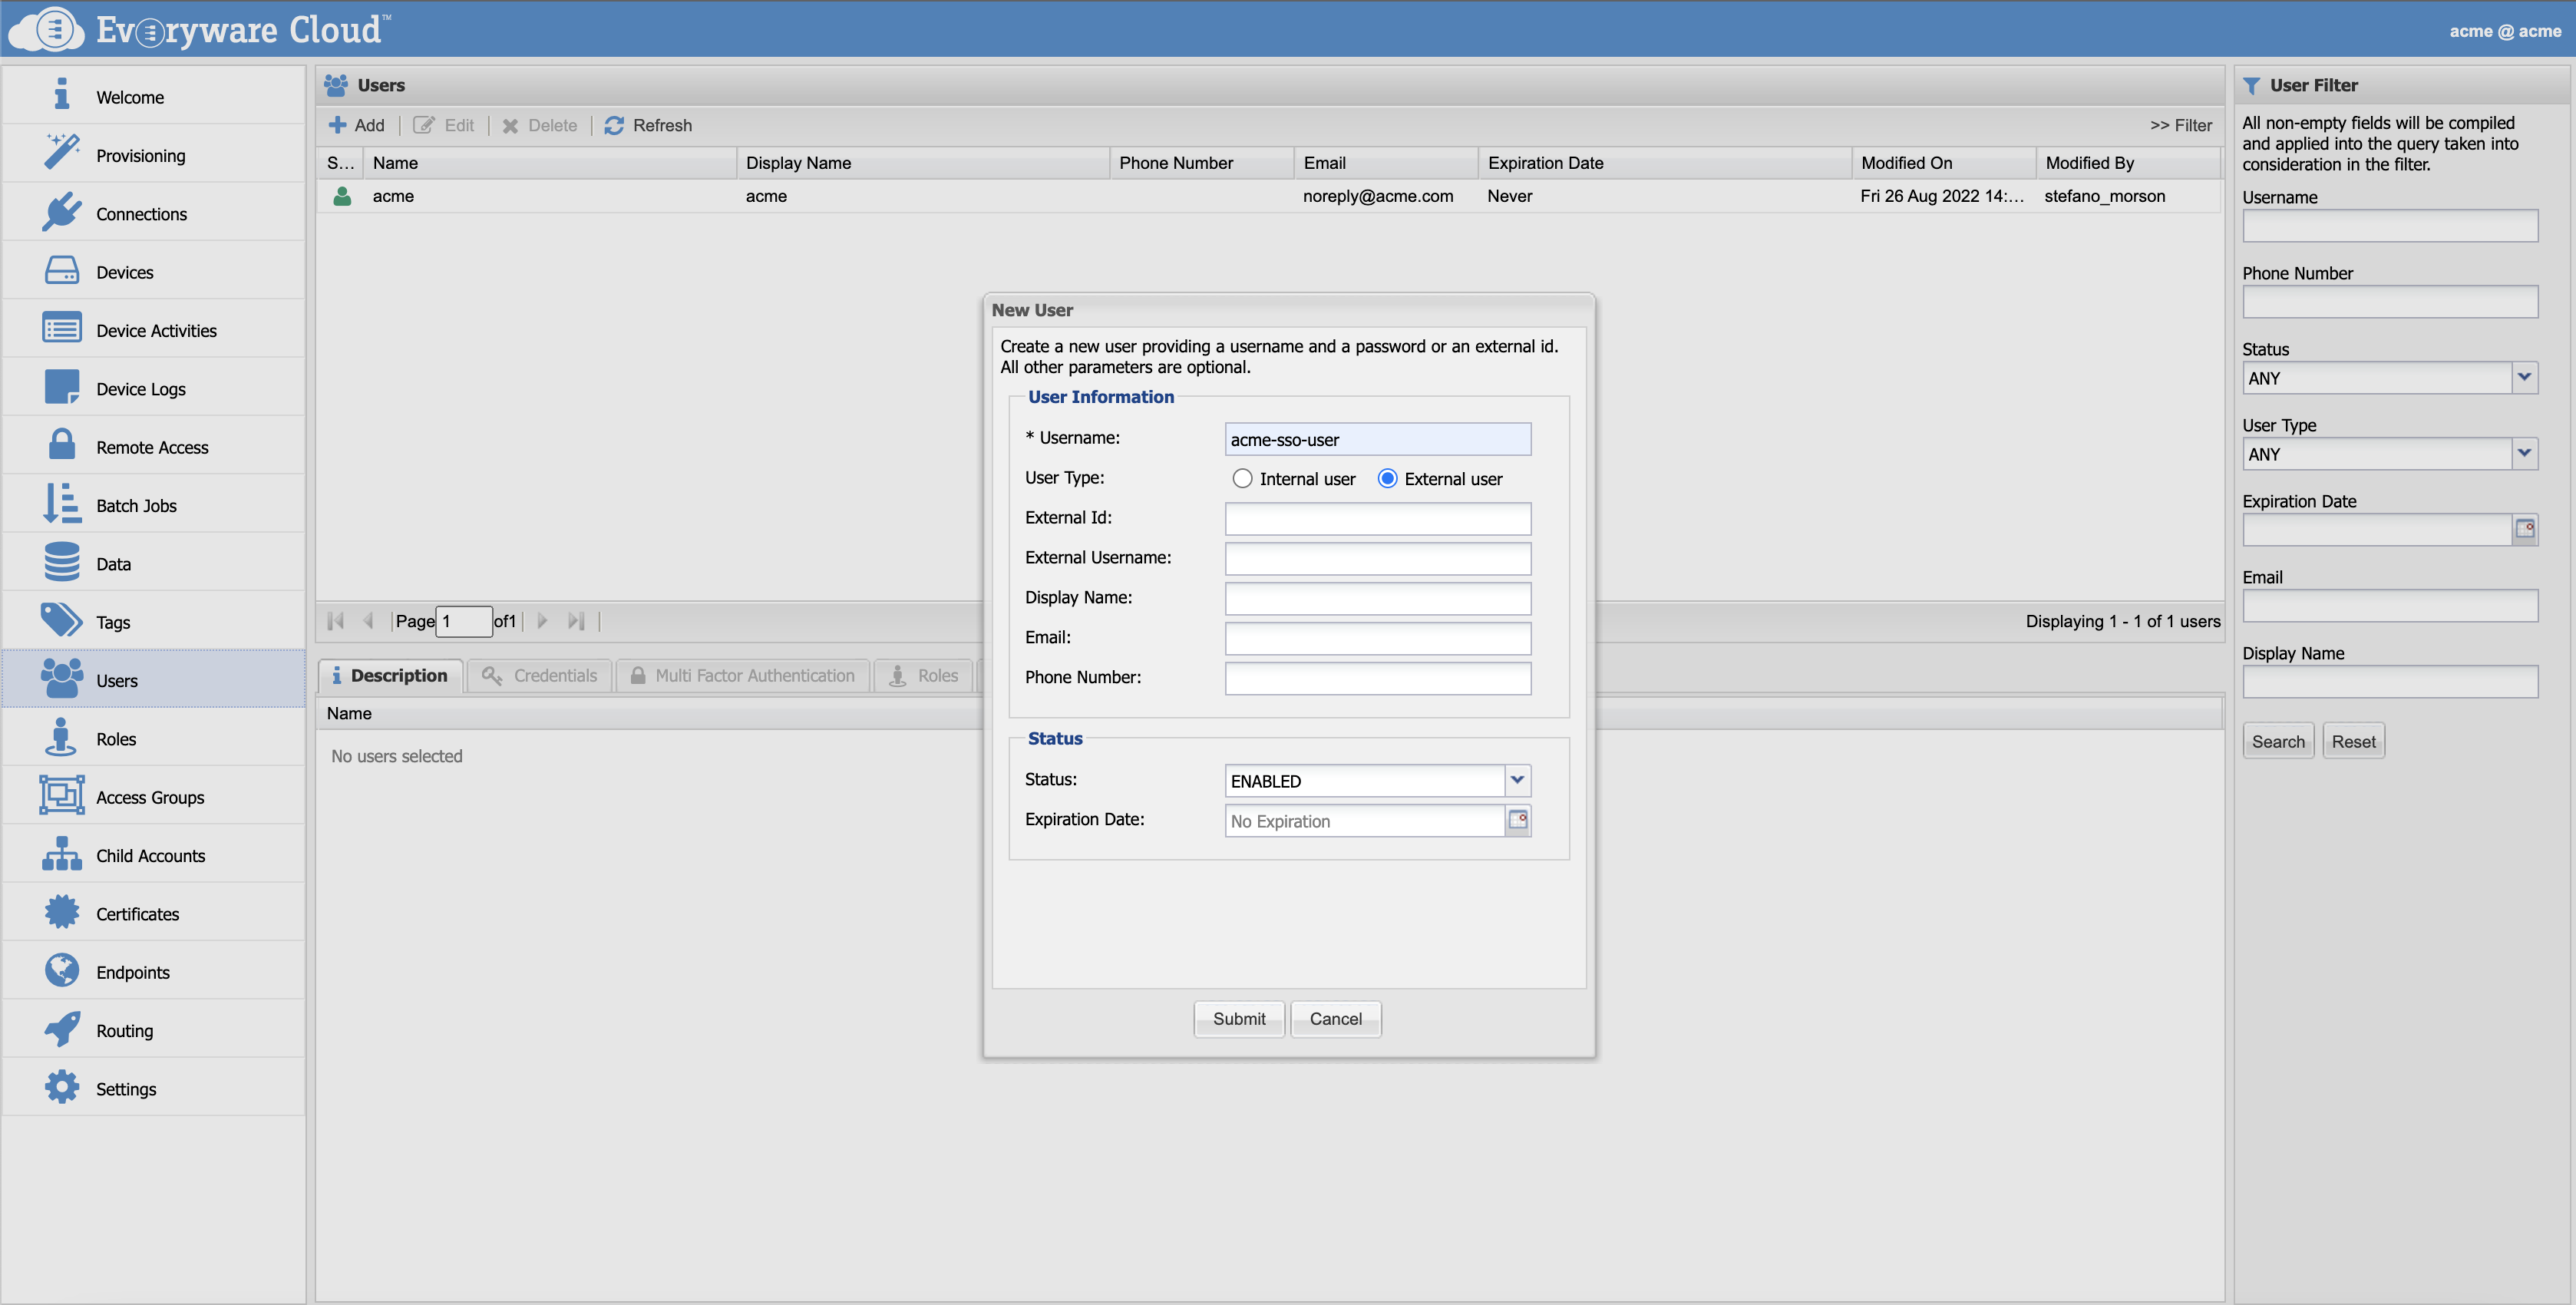
Assign the new user an Everyware Cloud local name by setting the Username field. Then, select the "External user" for the type. The fields "External Id" and "External Username" are used to link the user with the external identity. Which one to set may depend on the type of provider and authentication flow implemented. Check with your administrator the correct value to be assigned.
| Parameter | Description |
|---|---|
| External Id | User Id that identifies the user in the external Identity Provider. |
| External Username | Username that identifies the user in the external Identity Provider. |
Internally and externally authenticated users can coexist in an account.
Enabled services
Delegated authentication currently works with the Admin Console login. Authentication with Messaging service (MQTT), REST API service and Remote Access service (VPN) require internally authenticated users.
According to best practices, create dedicated users with specific roles/permissions to configure the authentication type that best fits your use case.
User Roles and Permissions
A user can be assigned one or more roles and can be granted one or more permissions.
More information on managing roles and permission is available in the Access Control section.
Edit an User
To make changes to an existing user, select the user from the Users and then click Edit.
Delete an User
To delete an existing user, select the user from the Users and then click Delete.
Updated 5 months ago
