Certificates
Everyware Cloud deploys a Certificate Registry Service. This service allows users to manage the certificates required by other Everyware Cloud services to accomplish their job. A certificate is characterized by one or more usages. There are currently three usages supported by the platform (more usages may be supported in future releases):
- JSON Web Token (JWT) Signing
- Device Management Signing
- TLS Mutual Authentication
JSON Web Token Signing
Within Everyware Cloud JWT tokens are used during the authentication phase. JWT tokens are an industry standard specified by RFC 7519. According to the specification, JWT tokens are a compact, URL-safe means of representing claims to be transferred between two parties. For example, a client app needs a token to get access the RESTful API; see section REST API for more details about using JWT tokens with the RESTful API.
Device Management Signing
Control message signing is a Everyware Cloud security functionality that is used by device management operations to guarantee that the identity of the EC instance issuing the management operation is valid and that the content of the related request message has not been tampered by a third, possibly malicious, party. See Gateway Management for more details regarding device management operations.
TLS Mutual Authentication
TLS Mutual Authentication certificates are used to establish a mutually authenticated TLS connection between the device (e.g. ESF) and Everyware Cloud. In order to implement this type of TLS connection, the platform holds the CA certificates or CA intermediate certificates that are need to validate the client certificate sent by the device during TLS handshake.
Required Certificates
The minimum requirement is that an account has to have a JSON Web Token Signing certificate. These certificates is provided by the root account.
Removing/Suspending/Revoking a certificate can lead to unavailability of some functionalities especially in the case of JWT certs and Device Management certs. While managing certificates be careful since removing/disabling them may have severe impacts for other users.
View Account Certificates
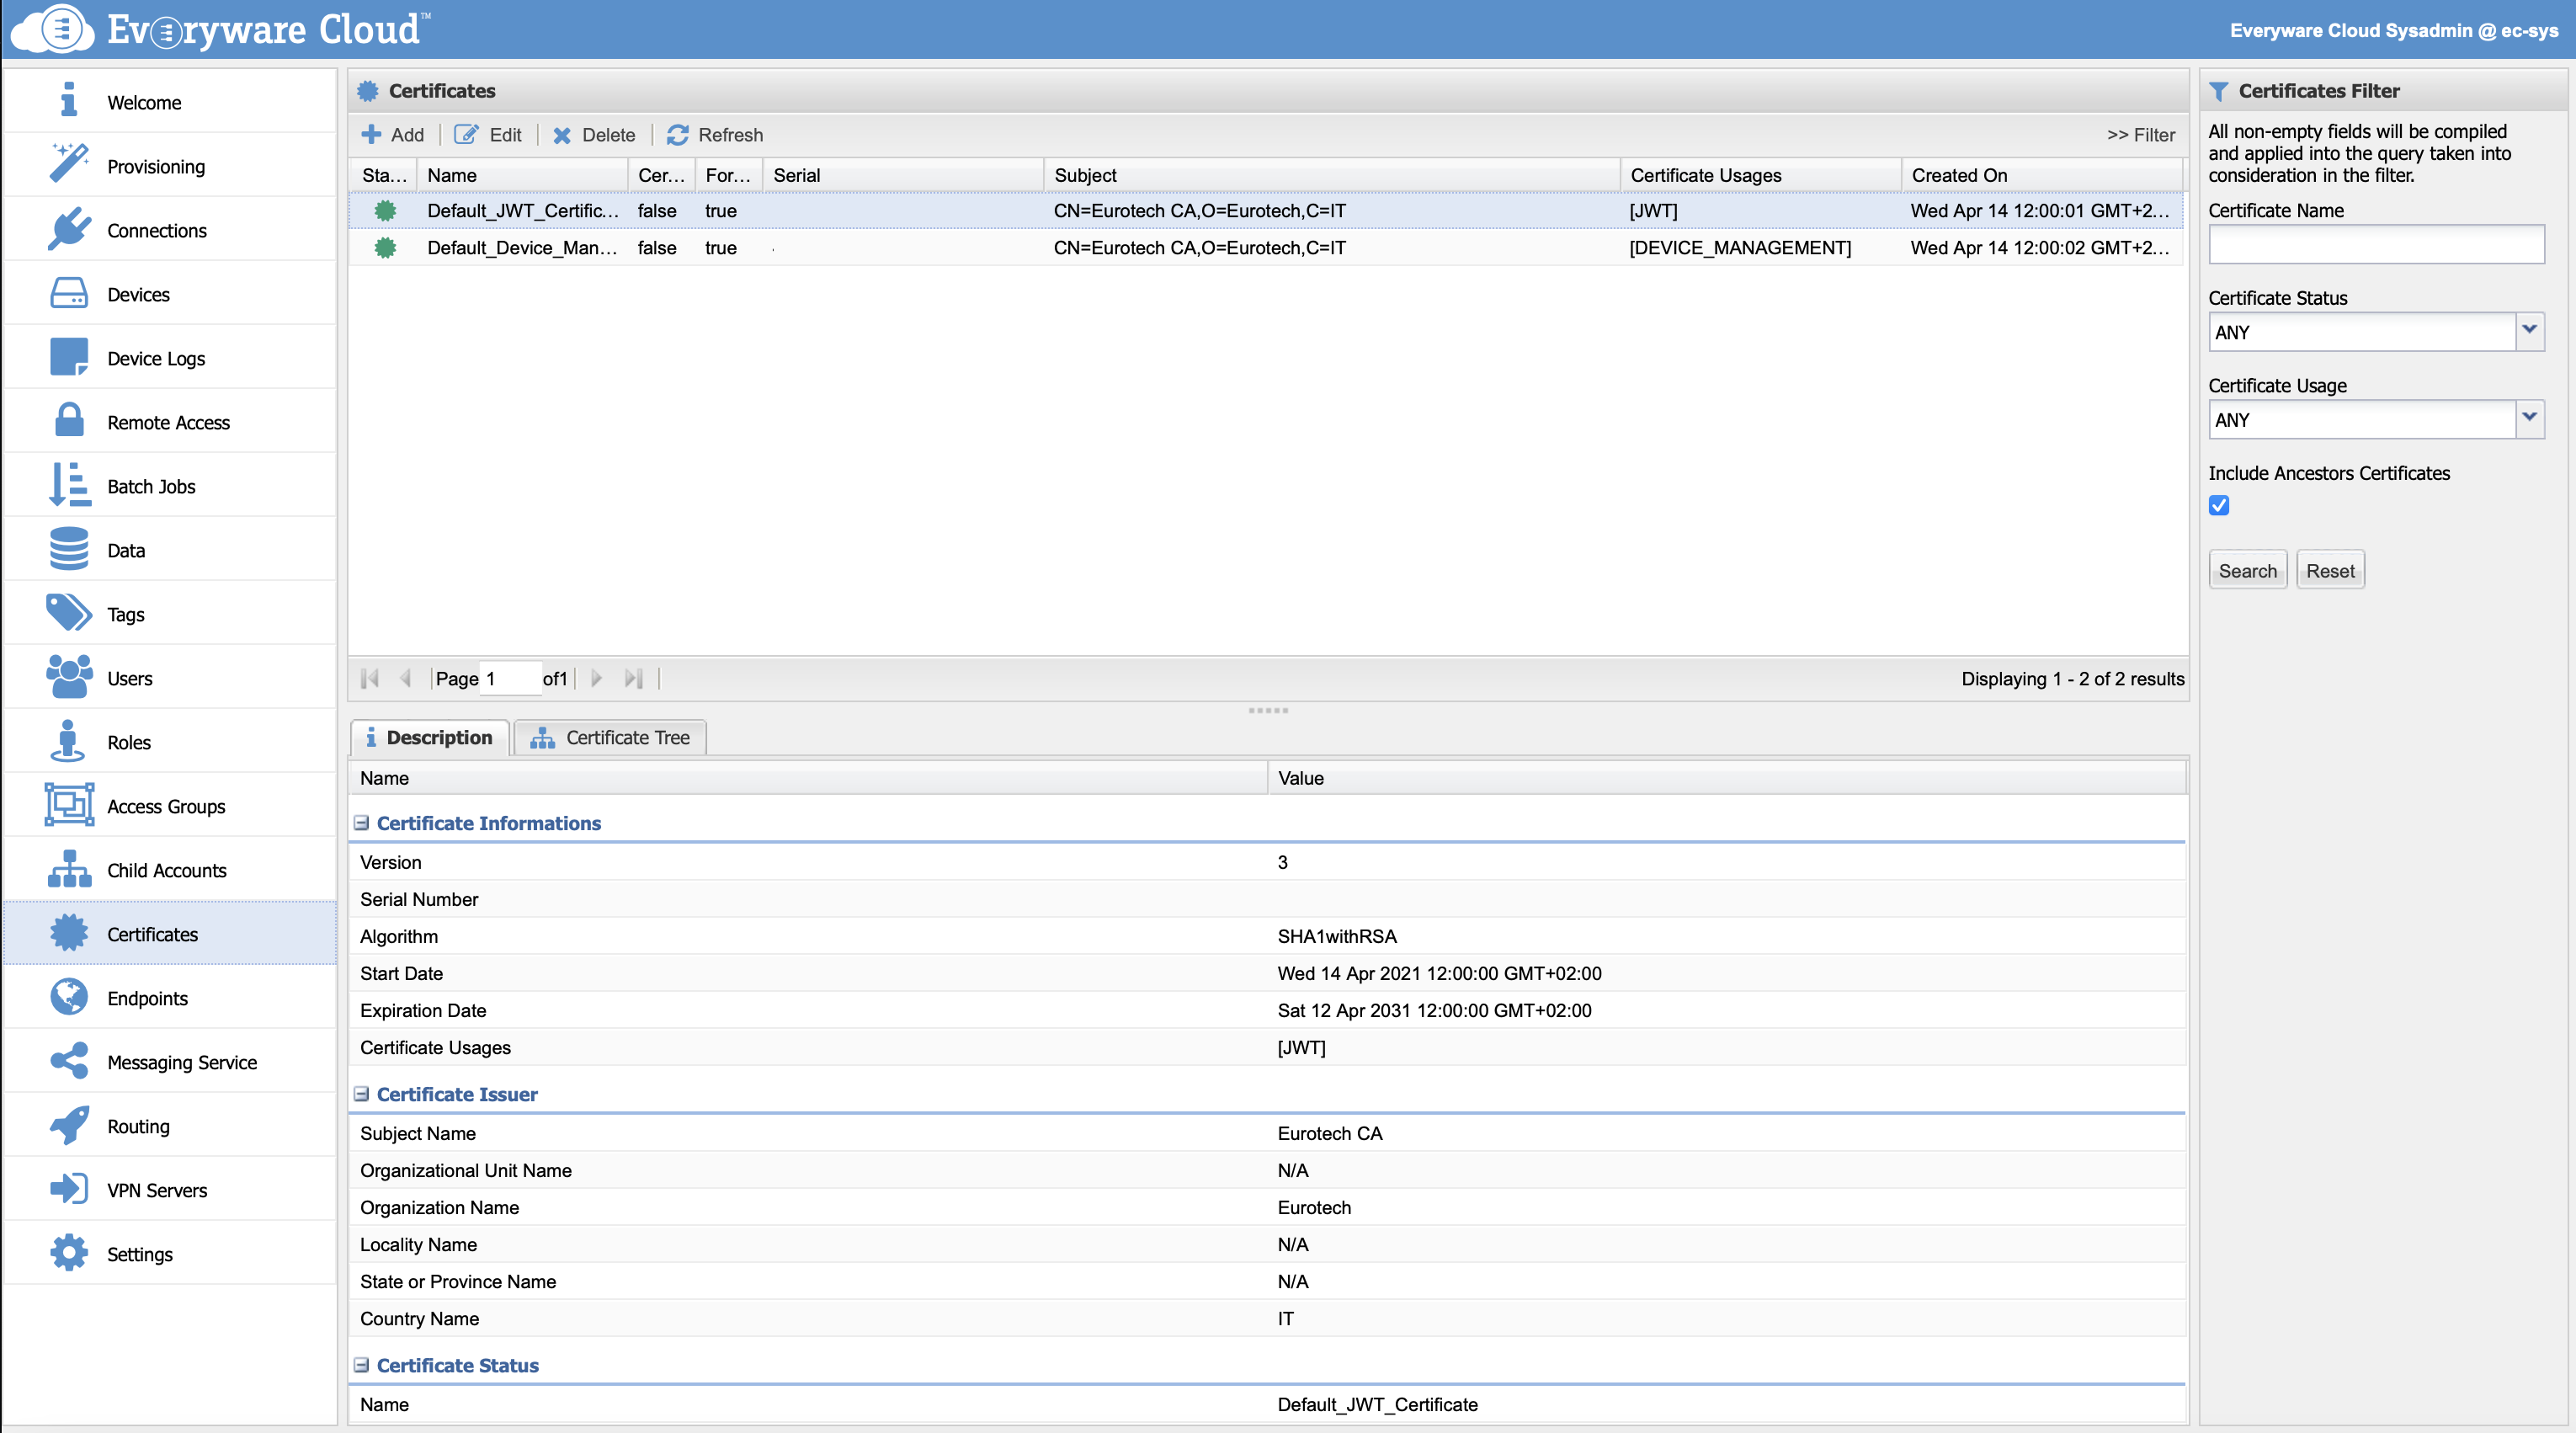
Certificates View lists all the available certificates. By clicking on a certificate entry the Description tab will show detailed informations regarding the certificate. The Certificate Tree tab will show certificate hierarchy for the cases when the certificate has a certificate authority.

Add a New Certificate
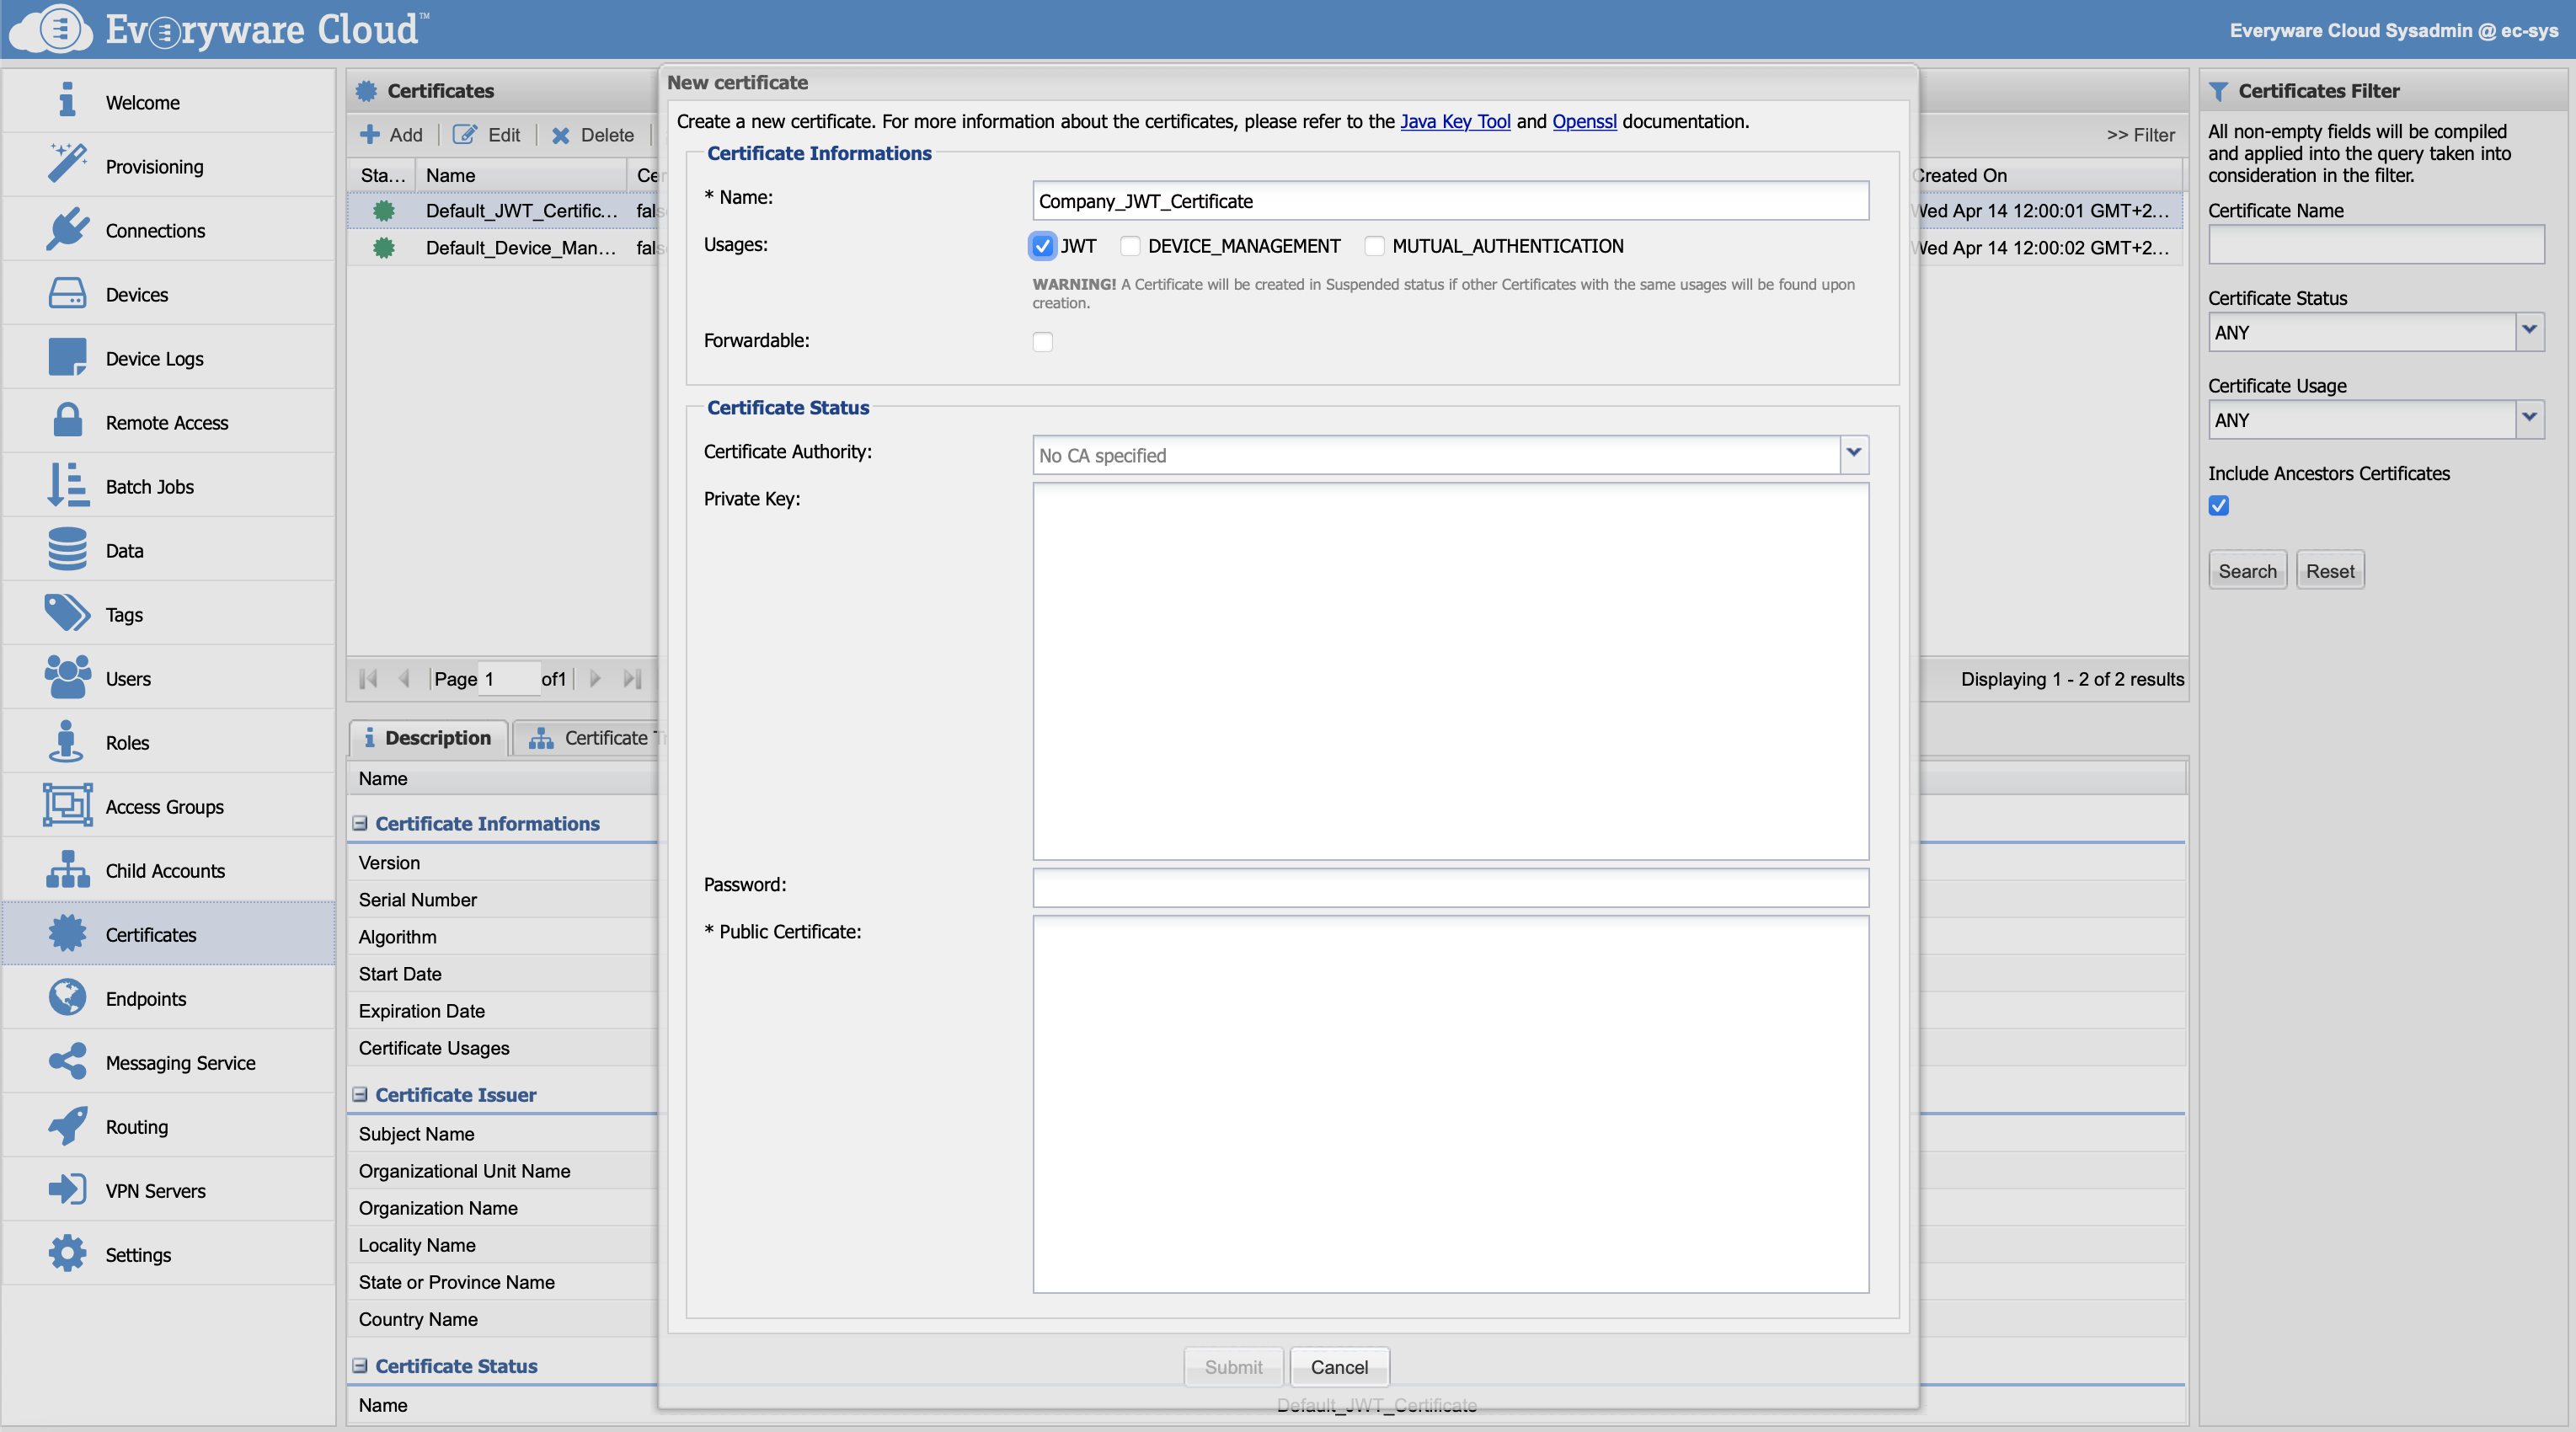
Account administrator can add new certificate entries from Everyware Cloud console. To create a new certificate entry, click the Add button in the Certificates section to open the New Certificate dialog as shown in the following screen capture.

The following table defines the Certificate Information for new certificates.
| Name | Must be at least 3 characters and can contain alphanumeric characters combined with dash and/or underscore. |
| Usages | Select one or more options |
| Forwardable | Check if the certificate has to be available for child accounts as well. |
| Certificate Authority | Select the certificate authority if any otherwise leave this field empty |
| Private Key | Copy paste the private key for the certificate |
| Password | Password used to decrypt the private key. If the private key is not encrypted leave the field empty. |
| Public Certificate | Copy paste the public certificate |
If there is already another valid certificate of the same usage, the new certificate entry will be added in status suspended.
Certificates used to manage JWT and Device Management signing require both a private and a public key. Certificates used to manage TLS Mutual Authentication require a public key.
Edit a Certificate
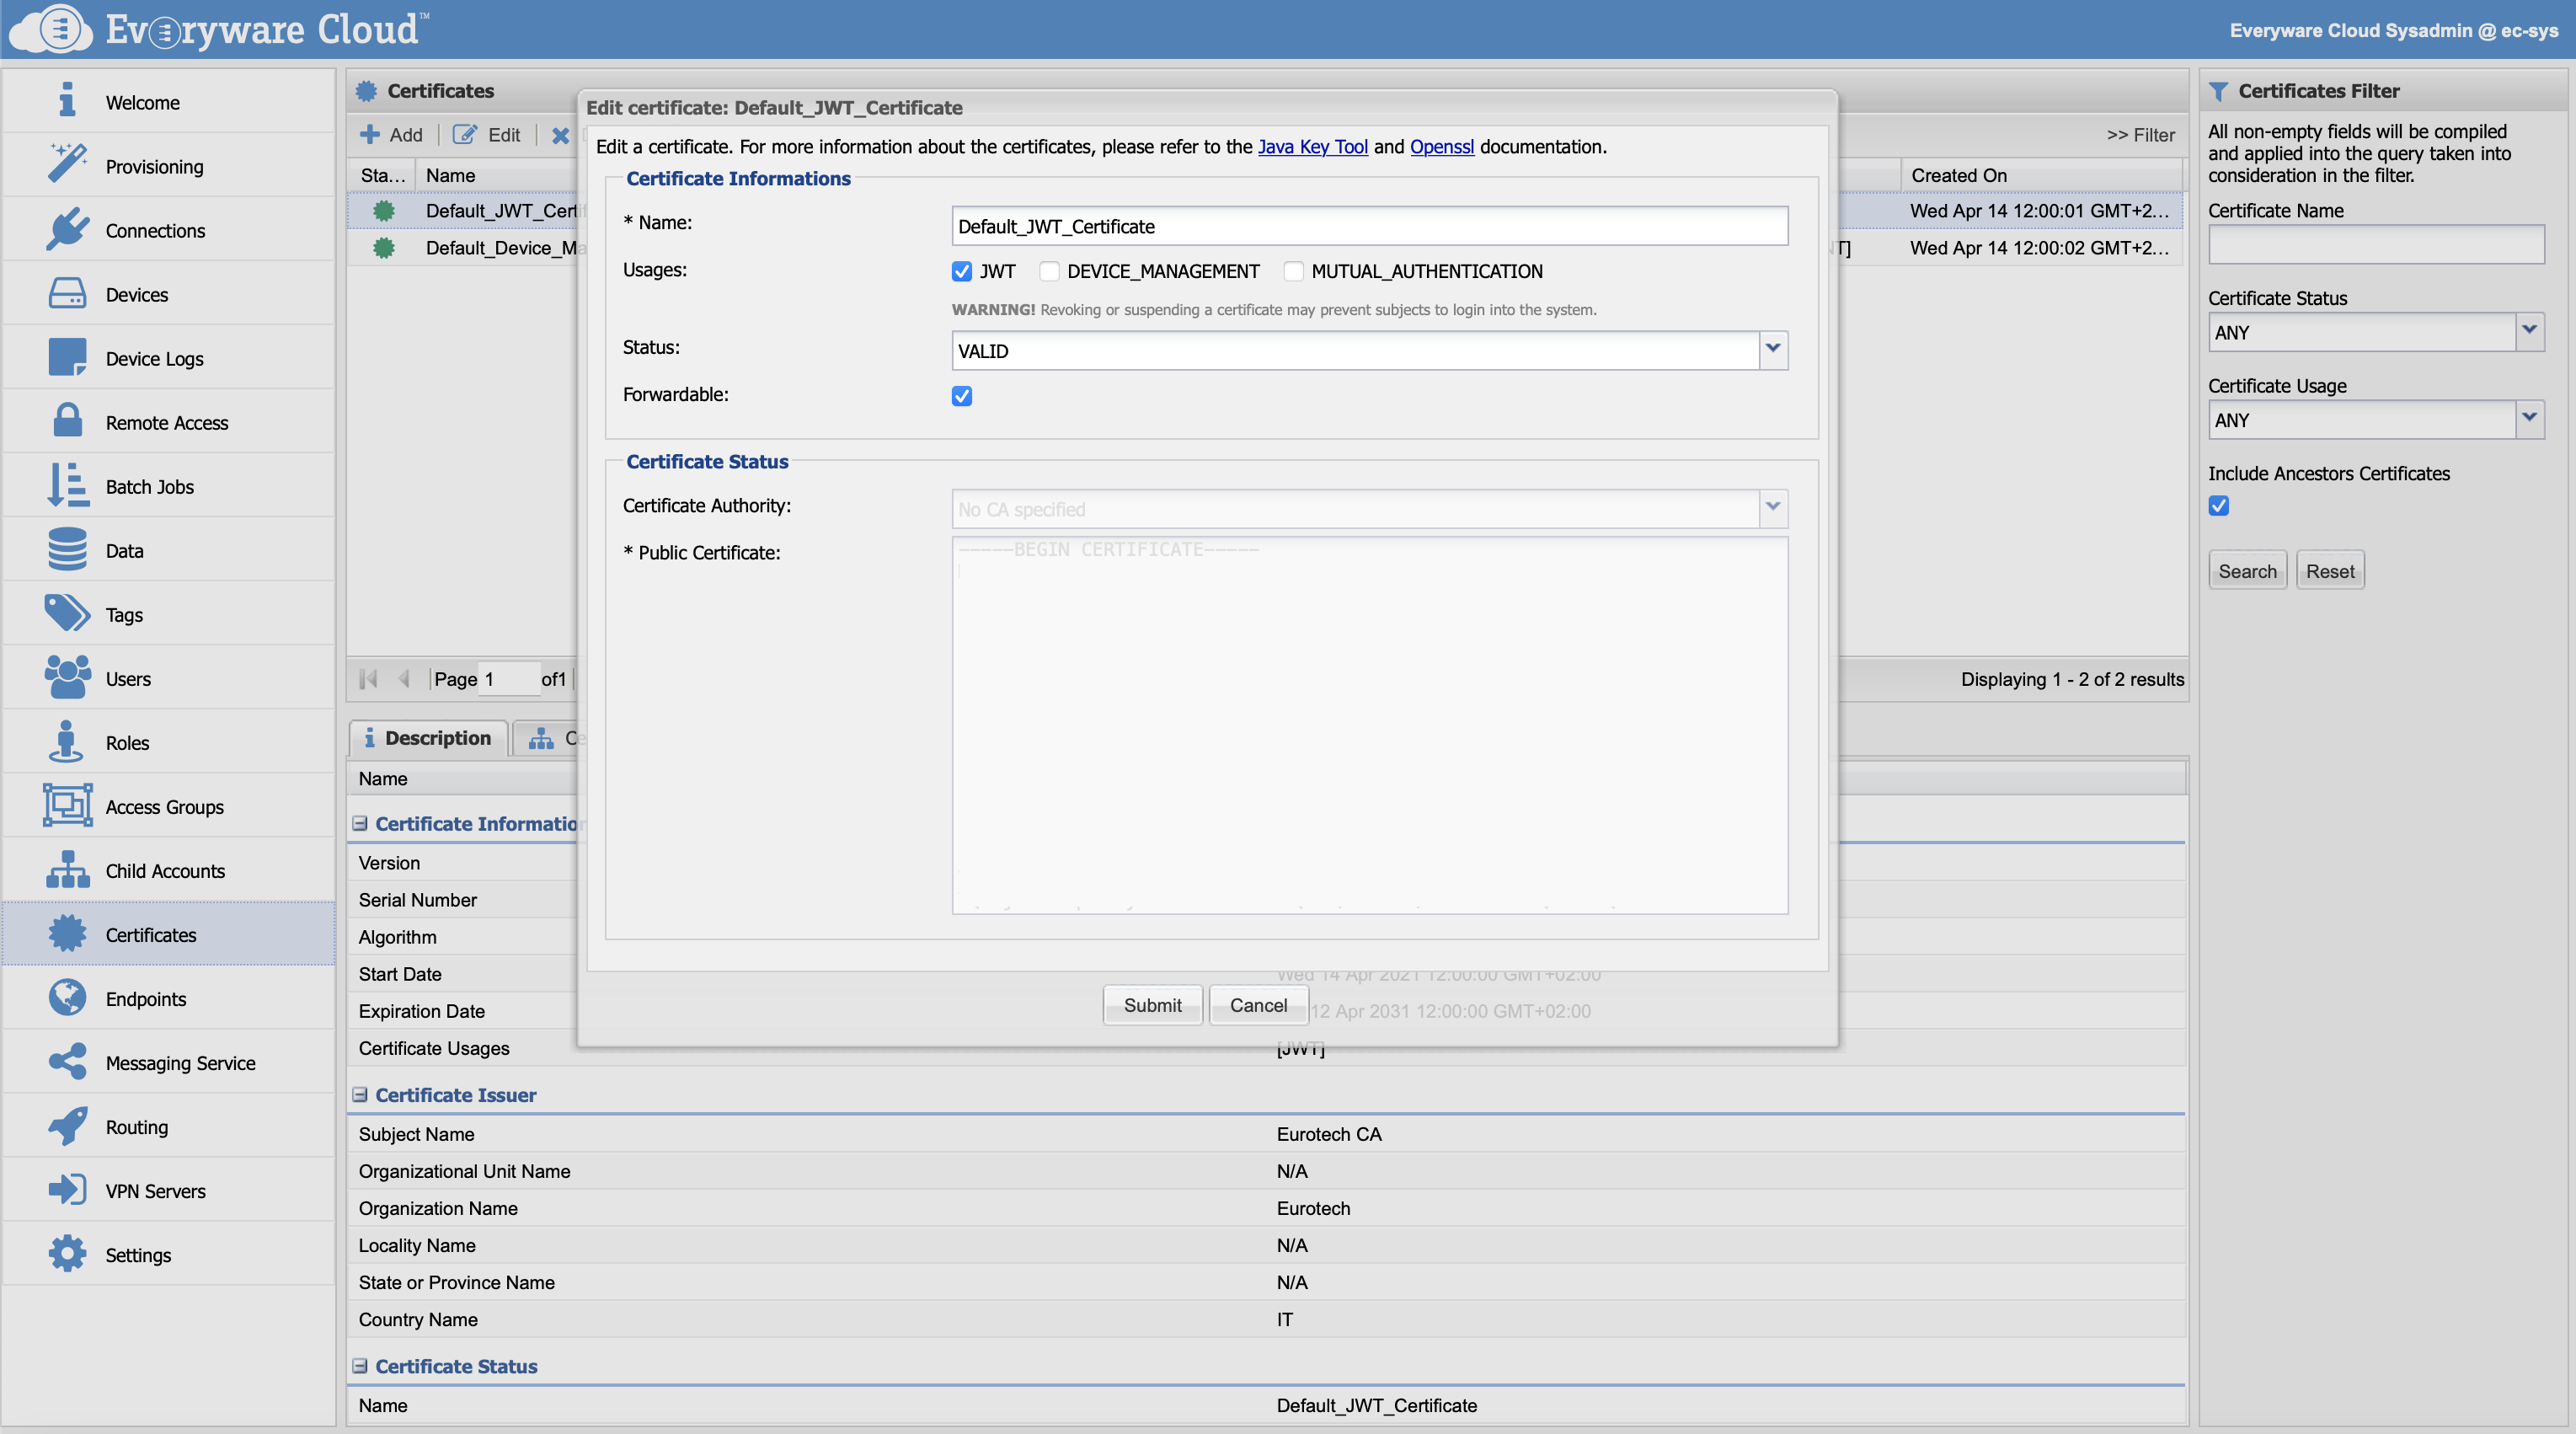
To make changes to an existing certificate, select the certificate from the Certificates view and then click Edit.

Certificates used to manage JWT and Device Management signing require both a private and a public key. Certificates used to manage TLS Mutual Authentication require a public key.
Delete a Certificate
To delete an existing certificate, select the certificate from the Certificates view and then click Delete.
Updated almost 4 years ago
