Accounts
Everyware Cloud is a multi-tenant platform. Each tenant is modeled under the concept of an Everyware Cloud account. The account provides the scope of a tenant by partitioning the devices, the data, the users and other information in the platform.
The account model is hierarchical. An account can have child accounts. Users in the parent account have access to the child accounts. In particular, the roles and the permissions granted to a user will apply to the scope of the user's account and all its child accounts.
When a new Everyware Cloud instance is installed, an account called "ec-sys" is created. "ec-sys" acts as a root account for all other accounts. Users with administrator role under the "ec-sys" account can administer the entire Everyware Cloud instance. Such users are referred to as Everyware Cloud Administrators.
ec-sys account
The "ec-sys" account should only be used for the administration of the Everyware Cloud platform. It is not recommended to connect IoT devices directly to ec-sys. Instead, create one account under ec-sys for each tenant, and connect the tenant's devices under those accounts.
Create a New Account
Everyware Cloud Administrators can create new accounts and configure the account settings. To create a new account, Administrators can login in the Everyware Cloud Console and navigate the Child Accounts section.
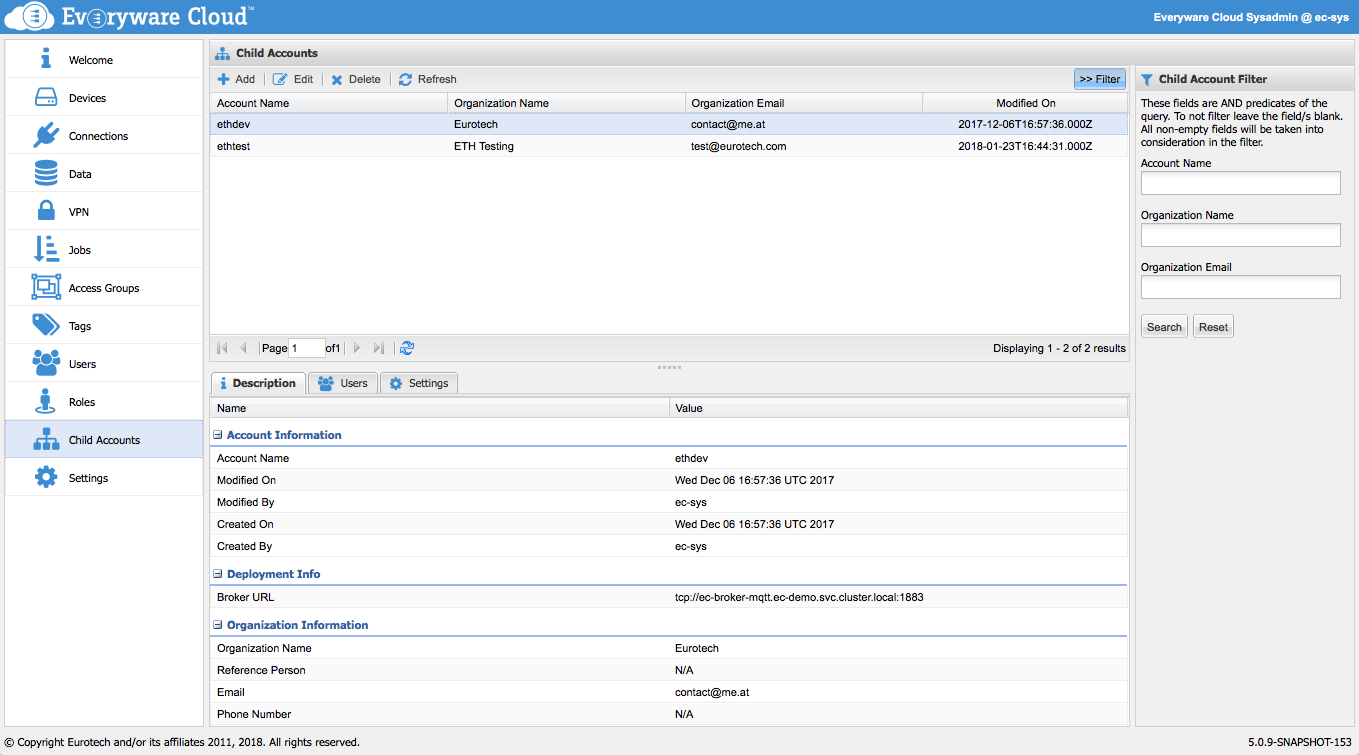
The Child Accounts section shows the list of all the child accounts created under the current account.
From the Child Accounts section, administrators can create new children, or edit and delete existing ones.

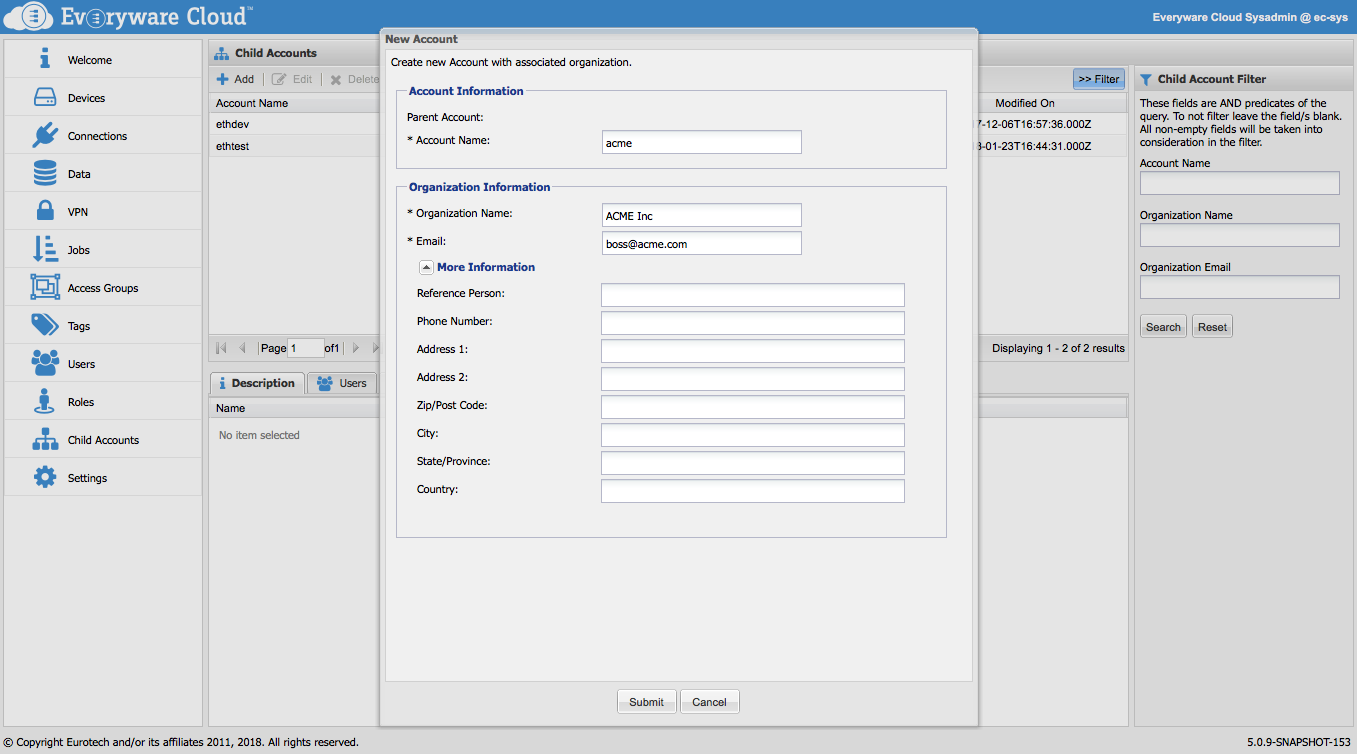
Click on the Add button in the toolbar to create a new account, then fill the New Account dialog form.
In the following example, an "acme" account is created:

Account Name
Account names are unique within the Everyware Cloud platform and they are immutable.
Account names cannot be changed once created.
For each account you must provide the organization name and an email address.
The organization name must be unique with the Everyware Cloud platform.
Once the Account has been created, proceed to review the Account Settings by selecting the created account in the table and clicking on the Settings tab. The recommended settings for a new account are described at the following page Account Settings.
Follow these steps to configure a new account:
- Review and configure the Account Settings (Account Settings)
- Switch to new Account
- Create new Users under the new Account (Users and Credentials)
- Assign Roles and Permissions to new Users (Access Control)
- Assign Account to a Messaging Service Instance (Messaging Service)
Assign Account to a Messaging Service Instance
The assignment is necessary and allowed only if the newly created account is a level-one account (i.e. a child account of the system root account).
Switch Current Account
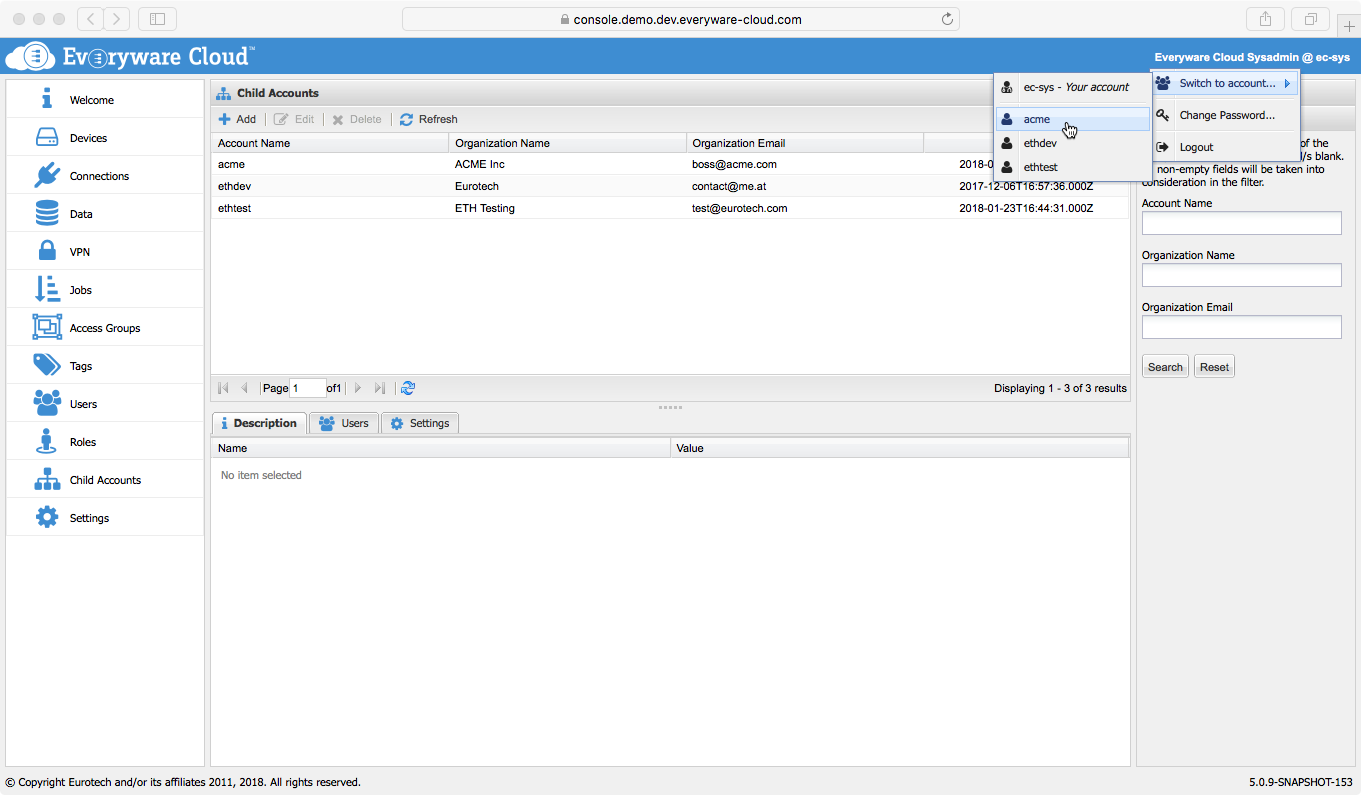
When a user logs into Everyware Cloud, the user's account will be set in scope. This can be verified in the upper right corner of the Everyware Cloud Console, where the name of the user is reported followed by the "@" character and then the name of the account under scope.
By clicking on the user's name, a menu is presented. The menu allows to Switch Account, to change password and to log out.
The Switch Account menu contains the name of all the accounts that are children of the current account. Select one of the child accounts to change the account in scope.

Edit an Account
To change the Account properties, select an account in the Accounts table and click the Edit button.
Delete an Account
To delete an Account properties, select an account in the Account table and click the Delete button.
Users of an Account
From the Account table, you can manage the users created under that account. Select an account in the Account table, then click on the Users tab. From the Users table, you can add new users, or modify and delete existing users.
Users Tab in the Account Page
You cannot change the Users permissions and roles from this Users table under the Accounts page. Switch into the account of your interest and access the Users page to be able to manage the users' roles, permissions and credentials.
The Users and Credentials page offers more details on how to manage the users in an account and their credentials while the Access Control page describes how to configure the users' role and permissions.
Updated over 3 years ago
