Automated Management
The automated management (also known as Batch Jobs) provides a tool to automate a set of device management operations against a predefined set of target devices.
This tool is meant to ease the management of large number of devices with similar purposes.
Components
The automated management feature is composed of the following main pieces:
- Job steps
- Targets
- Executions
- Scheduling
Job Steps
A job can be configured to have one or more steps to be executed.
Currently steps can be chained one after the other.
Job step definitions
The things that can be automated can vary according to the environment configurations.
For each Everyware deployment there will be a list of available Job Step Definitions. Each definitions represent a device management operation that can be chained to compose a job.
Each Job Step Definition has a title which resemble the action and a set of input parameters.
Input parameters can be simple types or complex objects but they usually match the API of their Device Management Services.
The list of available Job Step Definitions is public and all scopes have read access on it. Thus the scope may not have enough resources available to create a Job.
Targets
The job targets are the actual subject of the management.
For each target provided, there will be information associated per-target, regarding the status of the processing.
A target represents a Device, it is unique for each job, and belongs to only one Job. You can still specify a target which refers the same device in two separate jobs.
When added to a job, each target will be set to be on the first step, ready to be processed.
Executions
After a set of targets and a set of Job step have been defined, a Job can be started. Only one execution at a time can run for the same job instance, while you can have multiple execution running different jobs.
Scheduling
An Automated Management operation can either be started by the user on demand or it can be started by a trigger.
A Job trigger will automatically start a job at the defined time, with the defined repeating.
Time can be defined with two methods:
- Simple: defining a start and stop date, with a retry interval which can be defined in minutes, hours or days.
- Cron Expression: using a Cron expression that can be bound between a start and end date.
A Job can have multiple scheduling but each execution will always be one at a time.
Creating a Job
A job can be created through the Web Admin Console application.
The prerequisite are the following:
- Batch Job resources assigned to the scope: the scope must have at least one Batch Job allowed in the scope. Targets, steps, executions and triggers are not limited.
- One or more device registered into the scope: a job needs at least one target to start. The target device can be also disconnected.
- One or more Job Step Definition: a job needs at least one step to start.
- A user with
job:*:{yourScopeId}:*permissions.
Creaating a job
To create a Batch Job first you need to login into an existing account with the prerequisites described above and open the Batch Jobs view.
In here all created Batch Jobs will be listed with some informations on their status.
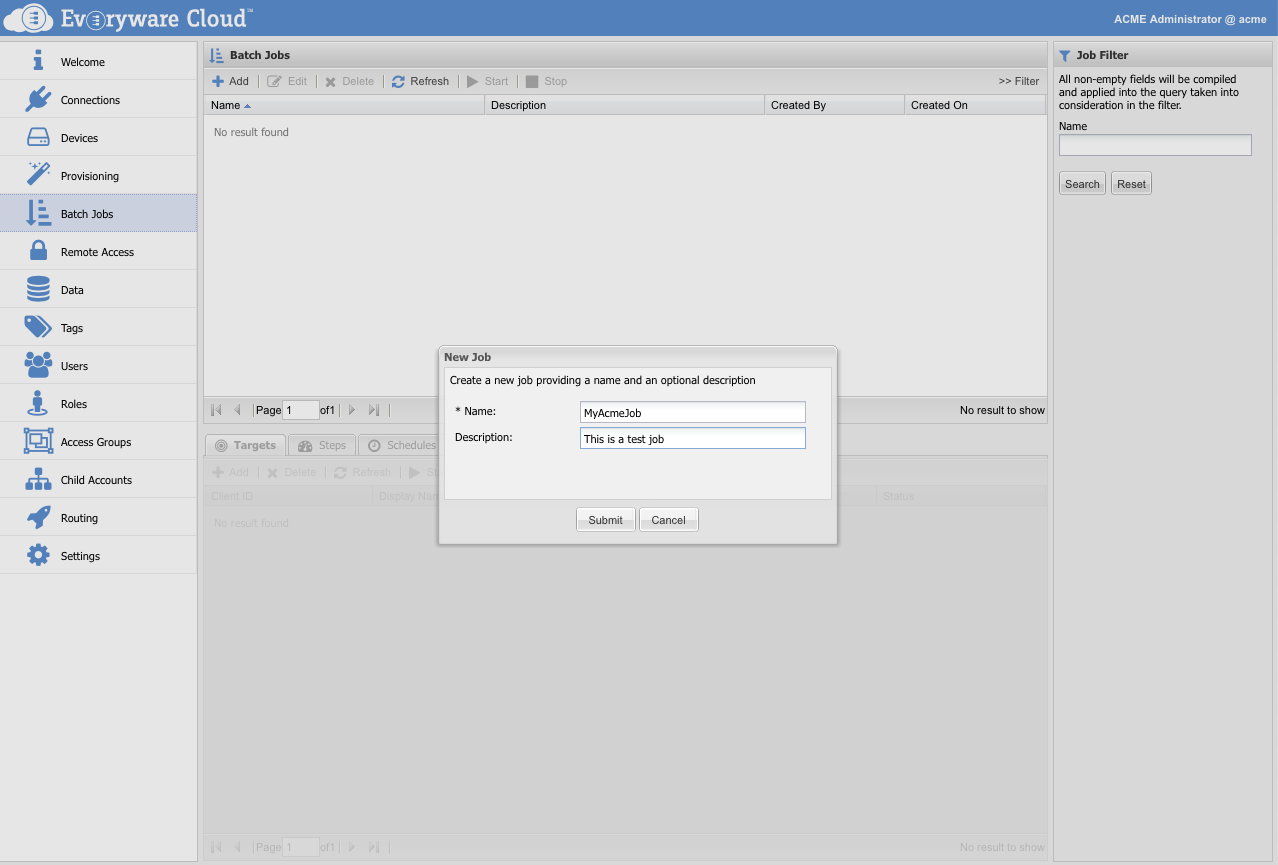
To create a new Batch Job select the Add button on the toolbar on the top grid.

Job add dialog example
The name of the job must be unique in the scope. It is advisable to use name that can make an entry easily recognisable.
Adding the targets
After the Batch Job has been created it can be selected, which enables the tabs underneath.
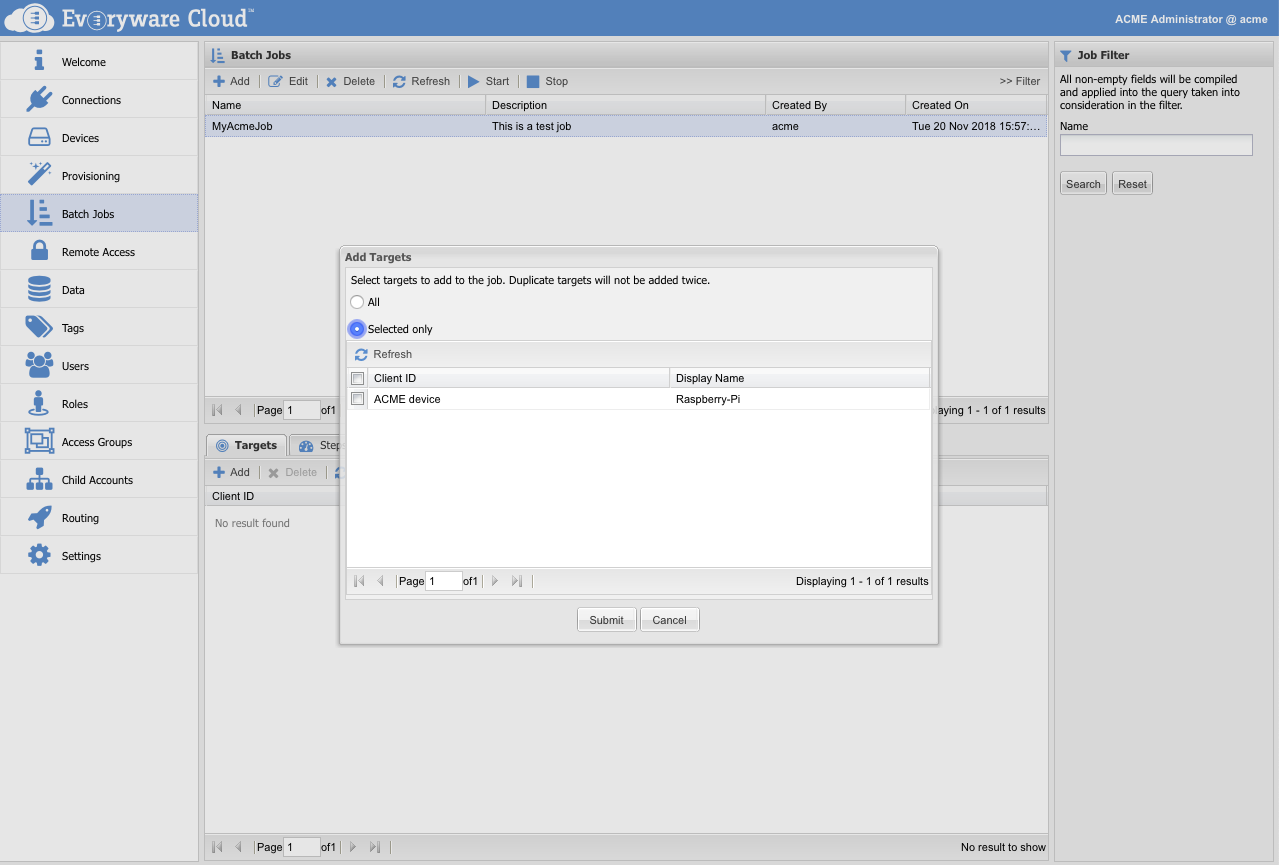
The Targets tab list and allow managing of the targets assigned to a single batch job. Like before, to add a new Target click on the Add button on the toolbar on the bottom grid.

Job target add dialog example
In this add dialog you can select all Devices available in the scope or select them one by one. Listed on the grid are the pairs of deviceId and display name of the devices.
Once you selected the desired target devices you can submit the form and the targets will be listed on the Targets grid.
In the grid informations on the processing status are shown, like at what processing step the device is (starting from 0) and what was the result of the processing at that step.
The list of Targets can be changed until the first start of the job. Then it becomes unmodifiable.
Adding the steps
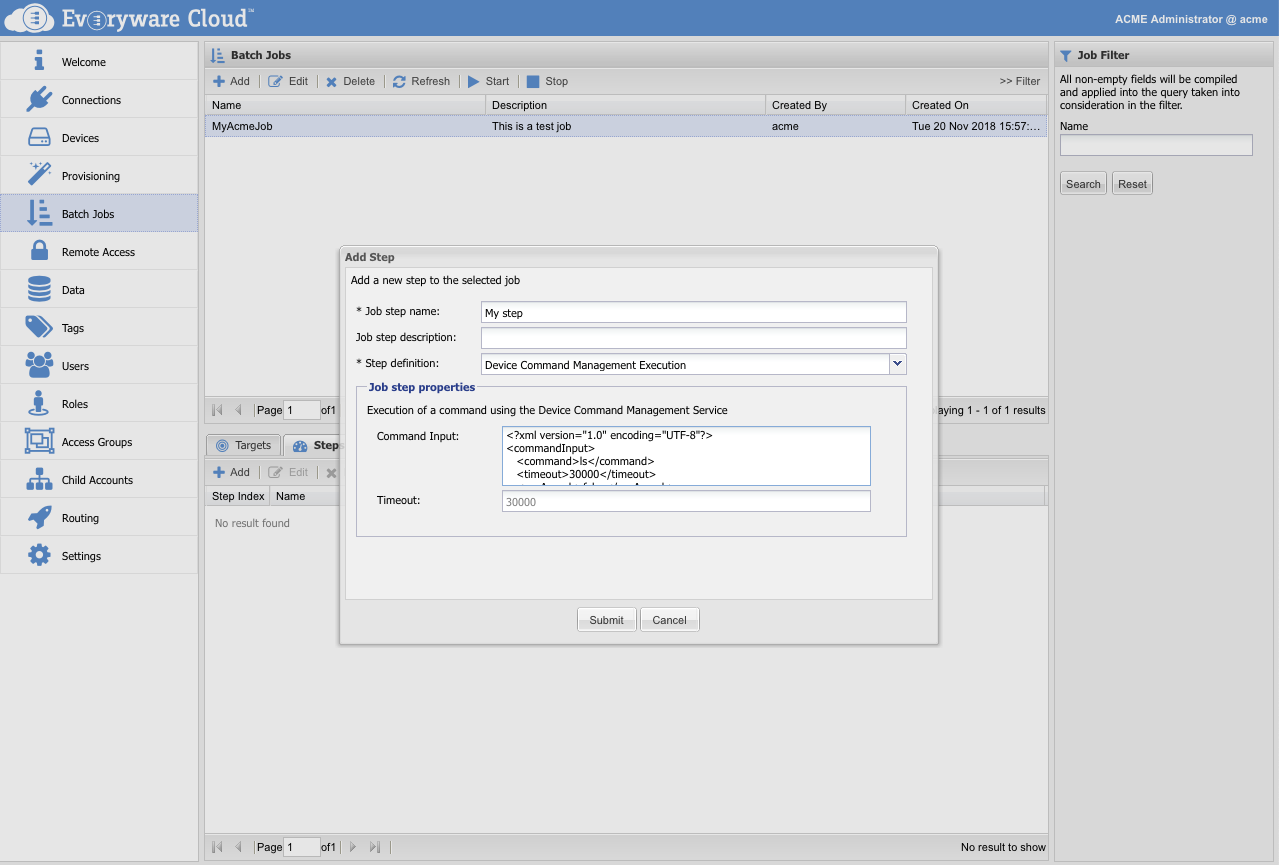
Moving to the tab Steps the ordered list of Step defined for the job. Once again to add a new Step click on the Add button on the toolbar on the bottom grid.

Job Step add dialog example with a Command Management Execution
In this dialog you can give a unique name to the Step and an optional description.
Using the dropdown menu you can select the type of the Step. Listed are the available JobStepdefinitions. Each JobStepDefinition has its own set of property and, by selecting different JobStepDefinitions the dialog adapts to the properties available.
According to the type of the input parameter, a input field or a textarea will be shown.
All primitive types, enums and KapuaIds will have a input fields and can be specifies as their String representation.
All other types of input parameter will be rendered on textareas and they must be specified according to their XML representation.
After submitting the form, a new Job Step will be listed in the grid. Adding one or more step of any kind, will append steps to the list.
Starting a job
After adding Job Targets and Job Steps, we can now start the job.
On the main job grid the Start button actually starts the Job. For the first start, all Job Targets will be executed from the first step (with step index 0).
Each target will be the subject defined in the current step. (i.e. looking at the example above, each Job Target will receive a Command Management Execution request with the given parameters). If the processing succeeds, the Job Target will be set to be processed in the next Job Step with the status AWAITING PROCESSING (or set as processing COMPLETED if it is the last Job Step). If the processing fails, the Job Target will remain at the current Job Step with the status of FAILED. Until all the targets have been processed in the current Job Step the processing of the next Job Step will not occur.
If the Job has already had an execution, starting again the Job will cause all Job Targets that have failed at some point to be reprocessed from the Job Step which they previously failed.
For each execution, a new Job Execution entry in created with information about the processing.
Scheduling the job start
If you want the job to be executed at a later time and/or with a specific retry scheduling, you can set a Scheduled Trigger to run the Job.
Trigger can be added from the tab Schedules. We can define a simple scheduling with a time interval or use a Cron Expression, according to our requirements.
Updated about 4 years ago
